

Here I will show you how to build and mount a CNC Thin Pen.
Update 02/16/18
- I changed the main tube size to 4-5/8" instead of 5-1/2"
- I added my KRMx02 adapter mount drawings
Thin Pen Recap
Pros:
- The pen holder can be slipped into the top of the main tube. This allows for quick pen changes.
- Uses standard size Sharpie ultra fine markers. Normal pens and pencils can also be used.
- IF you remove the clip from the pen cap, you can slip the pen and cap as a whole through the main tube.
Cons:
- You can't use in a router collet, so you must make a mount to hold the main pen tube.
What You Will Need
- 1/2" x 4-5/8" brass tube
- 15/32" x 4-5/8" brass tube
- 2, 7/16" x 1" brass tubes
- 3/8 x 1" bolt
- 2, 1/4" rubber bands
- Sharpie Ultra Fine marker
In addition, you will need the following:
- Hot Glue Gun
- 600 grit sand paper (to clean tubes)
- 220 grit sand paper (to rough tubes)
- Steel file or rotary tool (to remove burrs)
- Some way of cutting the tubes to length.
- Chisel
Please note that for those that dont want to cut or clean the tubes, I am offering them here:
Cutting the Tubes
If you have not read my page on cutting brass tube, you can find it here:
Cutting and Cleaning Brass Tube
Assembly
Step 1
Take an old chisel and lightly dent the both sides of one of the one inch tubes as shown here.
Do it twice on each side to create four small dents as shown here.
Step 2
Slip the tube over the end of the pen as shown here.
Use the other one inch tube to help force the tube onto the marker by tapping the end.
You should see the tube digging into the pen as shown here.
Step 3
Scratch or rough up the inside of the unused 7/16" x 1" tube.
Add a good amount of hot glue to the inside of the tube and insert the 3/8" x 1" bolt.
!!Warning !!
Watch your fingers holding the tube as the bolt can push hot glue out the oposite end.
Once the hot glue hardens, take some 220 grit sand paper and rough the outside of the tube.
Step 4
Using a chisel, place some small dents in the weight assembly as shown here.
This will allow the assembly to friction fit into the pen holder tube.
I used a small chisel and lightly tapped it to create the dents.
Start out with light dents. You can always add deeper dents to the weight assembly if it fits too loosely in the pen holder. By using this method, it allows you to replace the pen holder tube if it becomes damaged or if you need some help removing the marker.
Step 5
Insert the weight assembly into the end of the 13/32 x 4-5/8 tube as shown here.
Step 6
Deburr the open end of the tube with 220 grit sand paper. Polish the outside of the tube with 600 grit sand paper.
This is the pen holder.
Step 7
Deburr both ends of the 1/2" x 4-5/8" main tube with 220 grit sand paper.
Test fit the pen holder into this tube. It should slide very smoothly.
gravity should keep the pen holder bolt against the main tube.
Step 8
Slip the pen into the pen holder until it is flush with the rib in the pen.
Step 9
Slip the rubber band over the pen holder and seat it against the bolt as shown here.
The rubber band is used to keep the bolt from hitting the soft brass too hard if you drop a pen into the main tube.
Pen Holder Conclusion
Your pen holder is now complete. Its time to look into mounting the main tube.
Main Tube Mounting Options
The main tube is the 5.5" long 1/2" brass tube. It is held in place at some point on the Z axis. The Pen Holder assembly is then slipped into the main tube from the top.
Lets take a look at some of the mounting options for the main tube.
Adapter Ring


Adapter rings are best suited for plasma cutters where the torch is easily removable.
The ring was cut out of 1/2" stock with a outside diameter to match the torch mount (not counting the lip).
The inside hole was just under 1/2" to match the main tube.
The main tube is inserted into the adapter and when the torch mount is tightend it also tightens the adapter against the main tube.
If you have a CNC with a mount that has an opening larger than 9/16 you can make an adapter ring to hold the 1/2" main tube.
Dedicated Mount
In some cases if you are going to do a lot of pen marking, you may want to attach a dedicated pen mount, like the one shown here.
This one was machined out of Coran, but I have made them out of every material you can emagin.
Here is a video of the CNC Construction Set Plasma machine using a dedicated pen mount.
Note that I am using a dry erase marker on some melimine. The thin
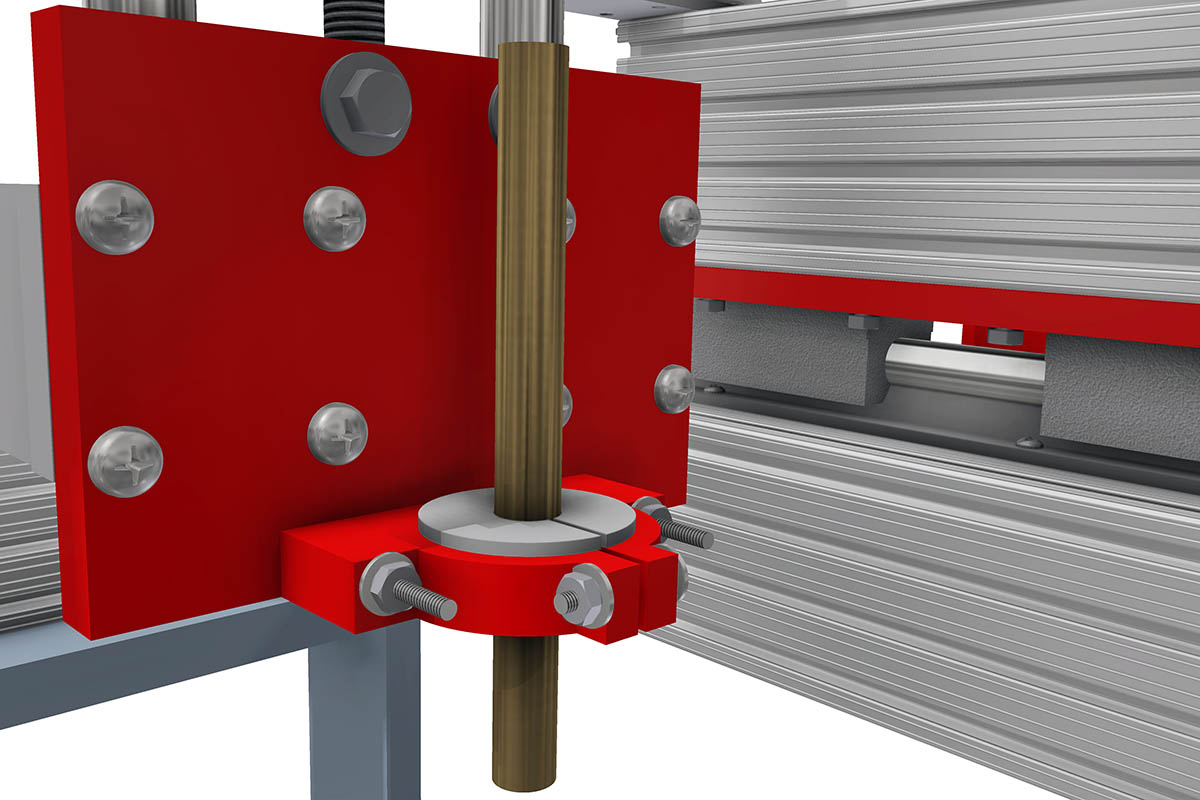
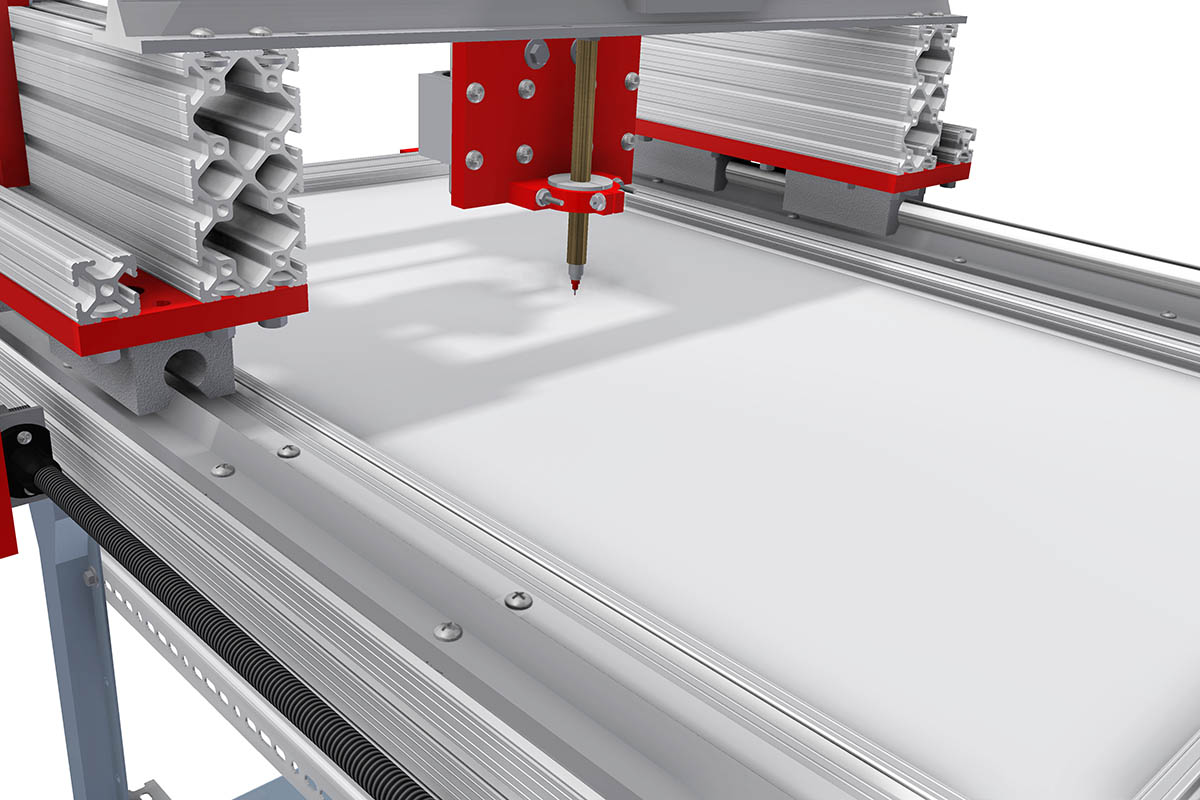
Adapter Mount
Here is a dedicated pen mount mounted on the KRMx02 AirExchanger.
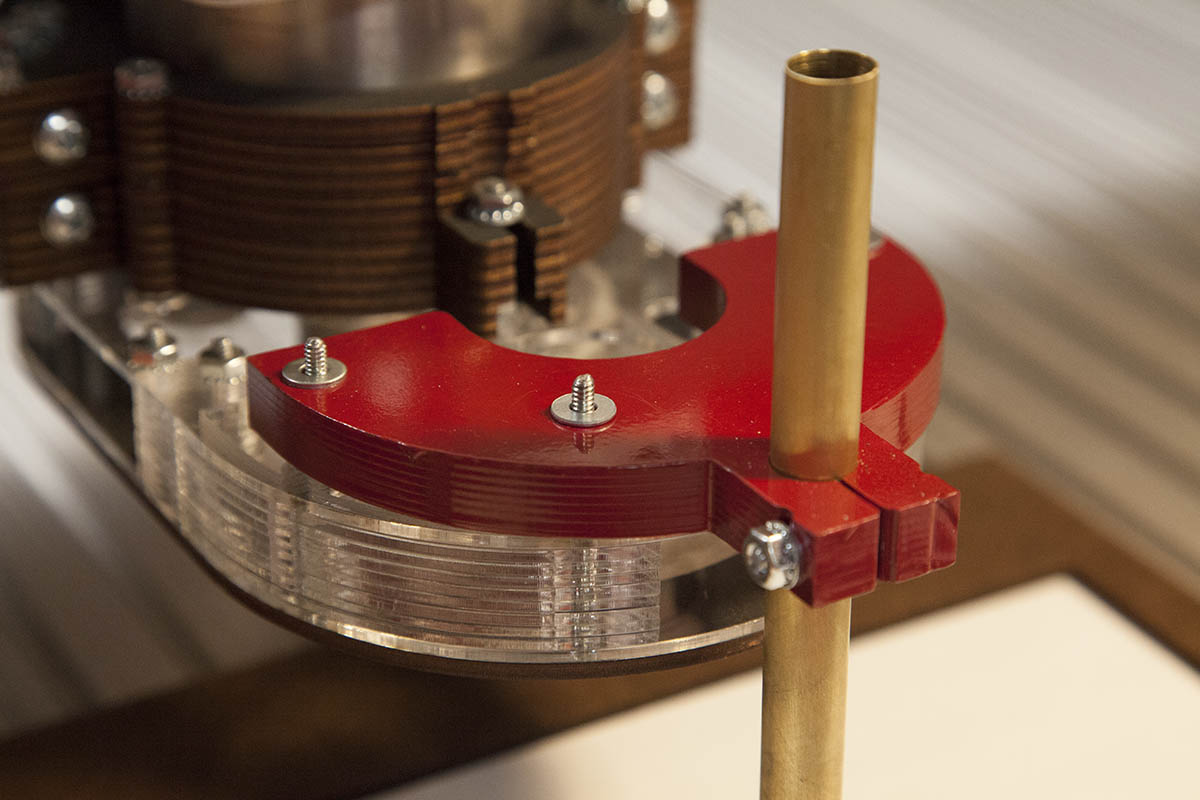
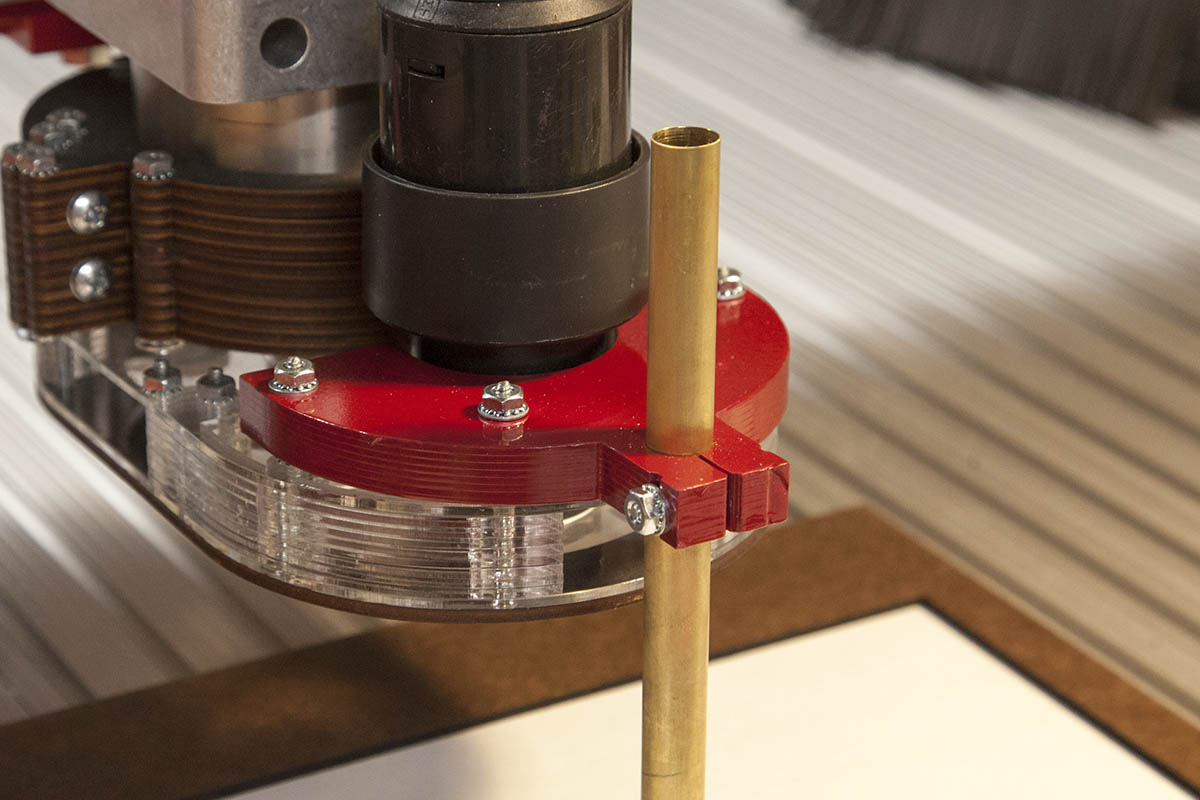
The four front screws on the AirExchanger were removed and 2" screws added to mount accessories.
The pen mount slips over the four screws and can be held in place with hex nuts or thumb screws.
The mount was designed so that the vacuum hose can remain in place as desigired.
The mount presents the main tube for very easy pen changes.
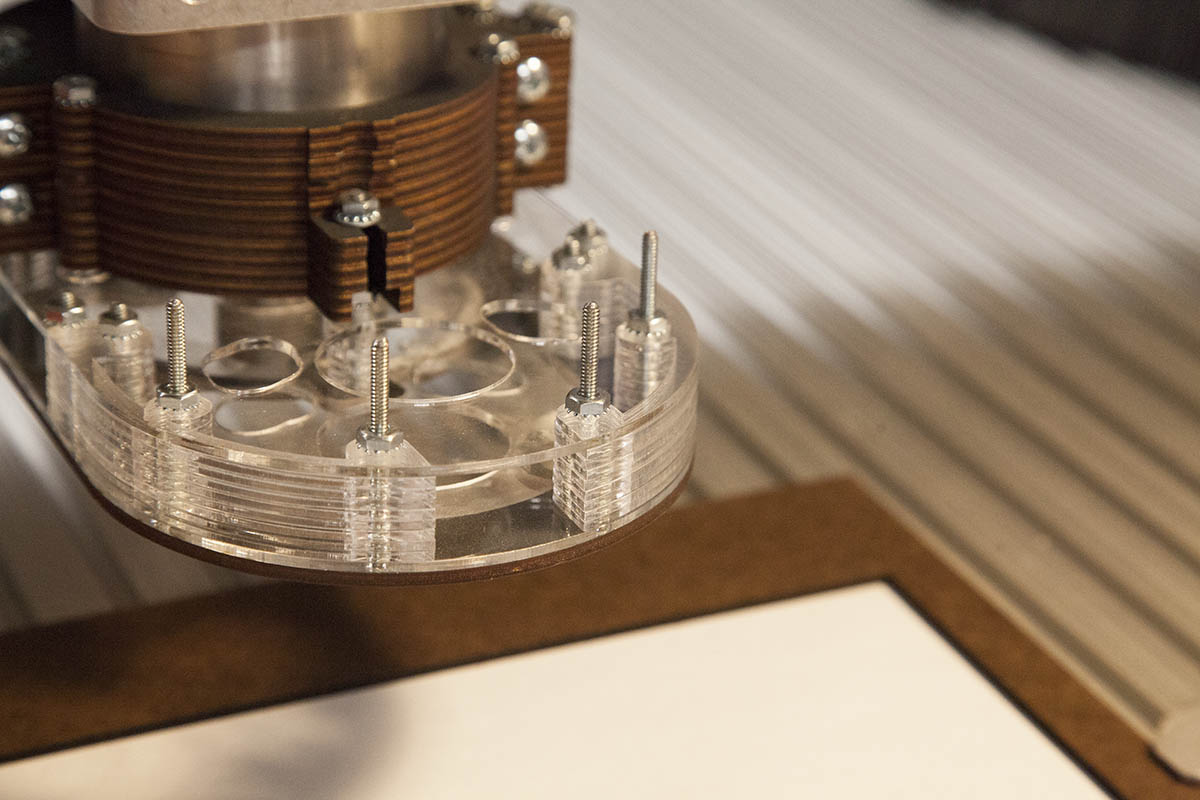
Here are four pen holders I have created so I can do some multi marking with the KRMx02.
Here is the drawing file I used to create the KRMx02 adapter.
Please note that the tube hole is actually .515" in diameter. This is to compensate with bit wear. It is best to start with just a little over .5" and work your way up until you get a nice tight press fit.
If you remove a little too much the tube may slip during use. You can cut a slit in the front and drill a hole through the front flange to provide some clamping pressure on the tube.
Note that by spray painting the inside will also make it tighter.
One technique I used was to set the drawing to 1/2" . This would make the hole just a little too small. I then used a drill press and a 1/2" drill bit to drill out the hole. This gave me a very nice press fit hole that could be used with or without the slot and clamp screw mentioned above.
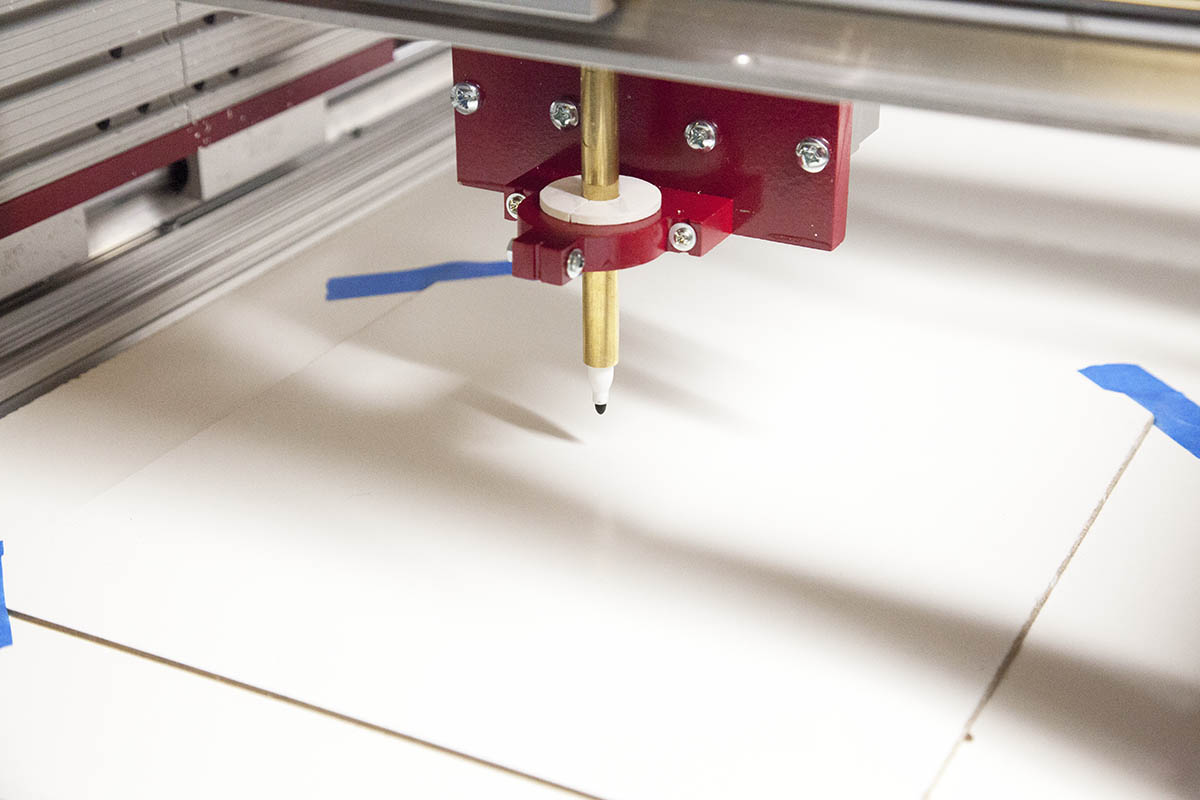
The KRMx02 and multi marker mount in action.
Conclusion
To use multiple pens with Mach3, just set the "Stop Spindle. Wait for Cycle Start" option in the Tool Change panel under General Configuration.
The CNC will stop and wait for you into drop the pen/marker into the main tube.
Note that you must assign a different tool number to each pen color. It is also better if you group all colors together. This will result in less pen changes.
While I did push the Sharpie markers a little too hard, I am estatic about the results. Try and use feed speeds of less than 150IPM for better results.
Note that there is no limit to the number of pens you can use. Also know that you are not restricted to just marking on paper. The sky is the limit. Tiles, metal panels, wood, ceramics