

There are three directives when machining aluminum.
- Chip Evacuation
- Lubrication
- Cooling
In this series, I will take you through my journey dealing with all three. It is my ultimate goal to build a MQL system.
What is a MQL system?
MQL stands for "Minimum Quantity Lubricant". In very simplified terms, an MQL system will provide the minimal amount of coolant/lubricant to the tool and part being machined.
Commercial MQL systems are very expensive, often outside the range of hobbyists and small business. It is my goal here to build an MQL system or at least one that comes close.
My goals
Eventually I want to provide a set of plans with an in-depth BOM and step by step instructions. However, first I need to do some R&D.
Here are some of my initial goals:
- Ability to clear chip with a blower
- Ability to deliver lubricant on demand
- Allow the CNC controller to turn on and off the system.
- MQL controller that can control the burst of lubricant manually or automatically
- No Fogging
- No Misting
- No Flood
- All the parts must be readily available
An Early MQL Test
System Components
First, let me start by stating that the components listed here are subject to change, as I am in the early stages of R&D.
Coolant/Air Mixer

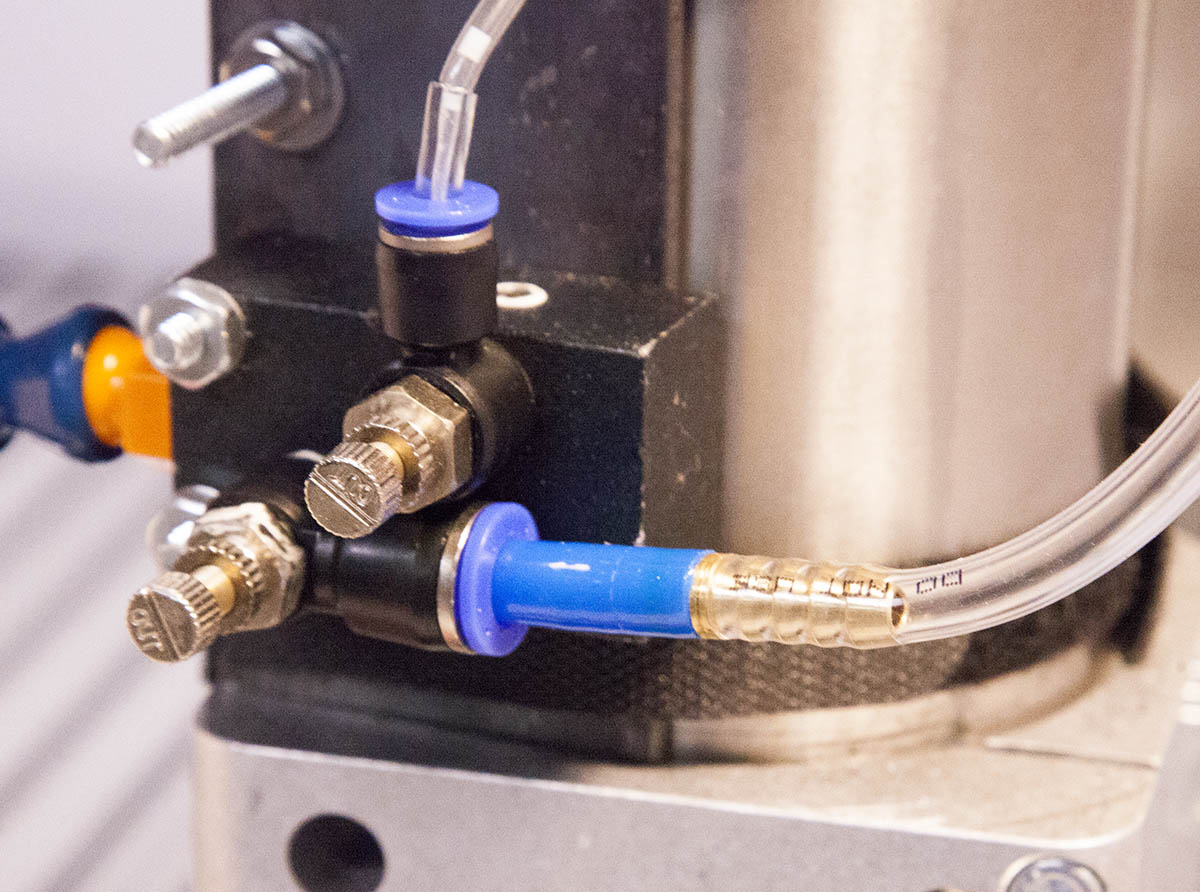
To combine the lubricant with my blower air, I am using the following mister.
While I am not using it as a mister, it does a good job at providing me with control over both the airflow and the coolant.
The downside to this mister, is the metric tubing. I was able to run my 1/8" OD tubing inside a piece of 3mm tubing. Since I am dealing with very low pressures this works just fine.
On the blower inlet, I used a barbed adapter.
Coolant Tank/Regulator
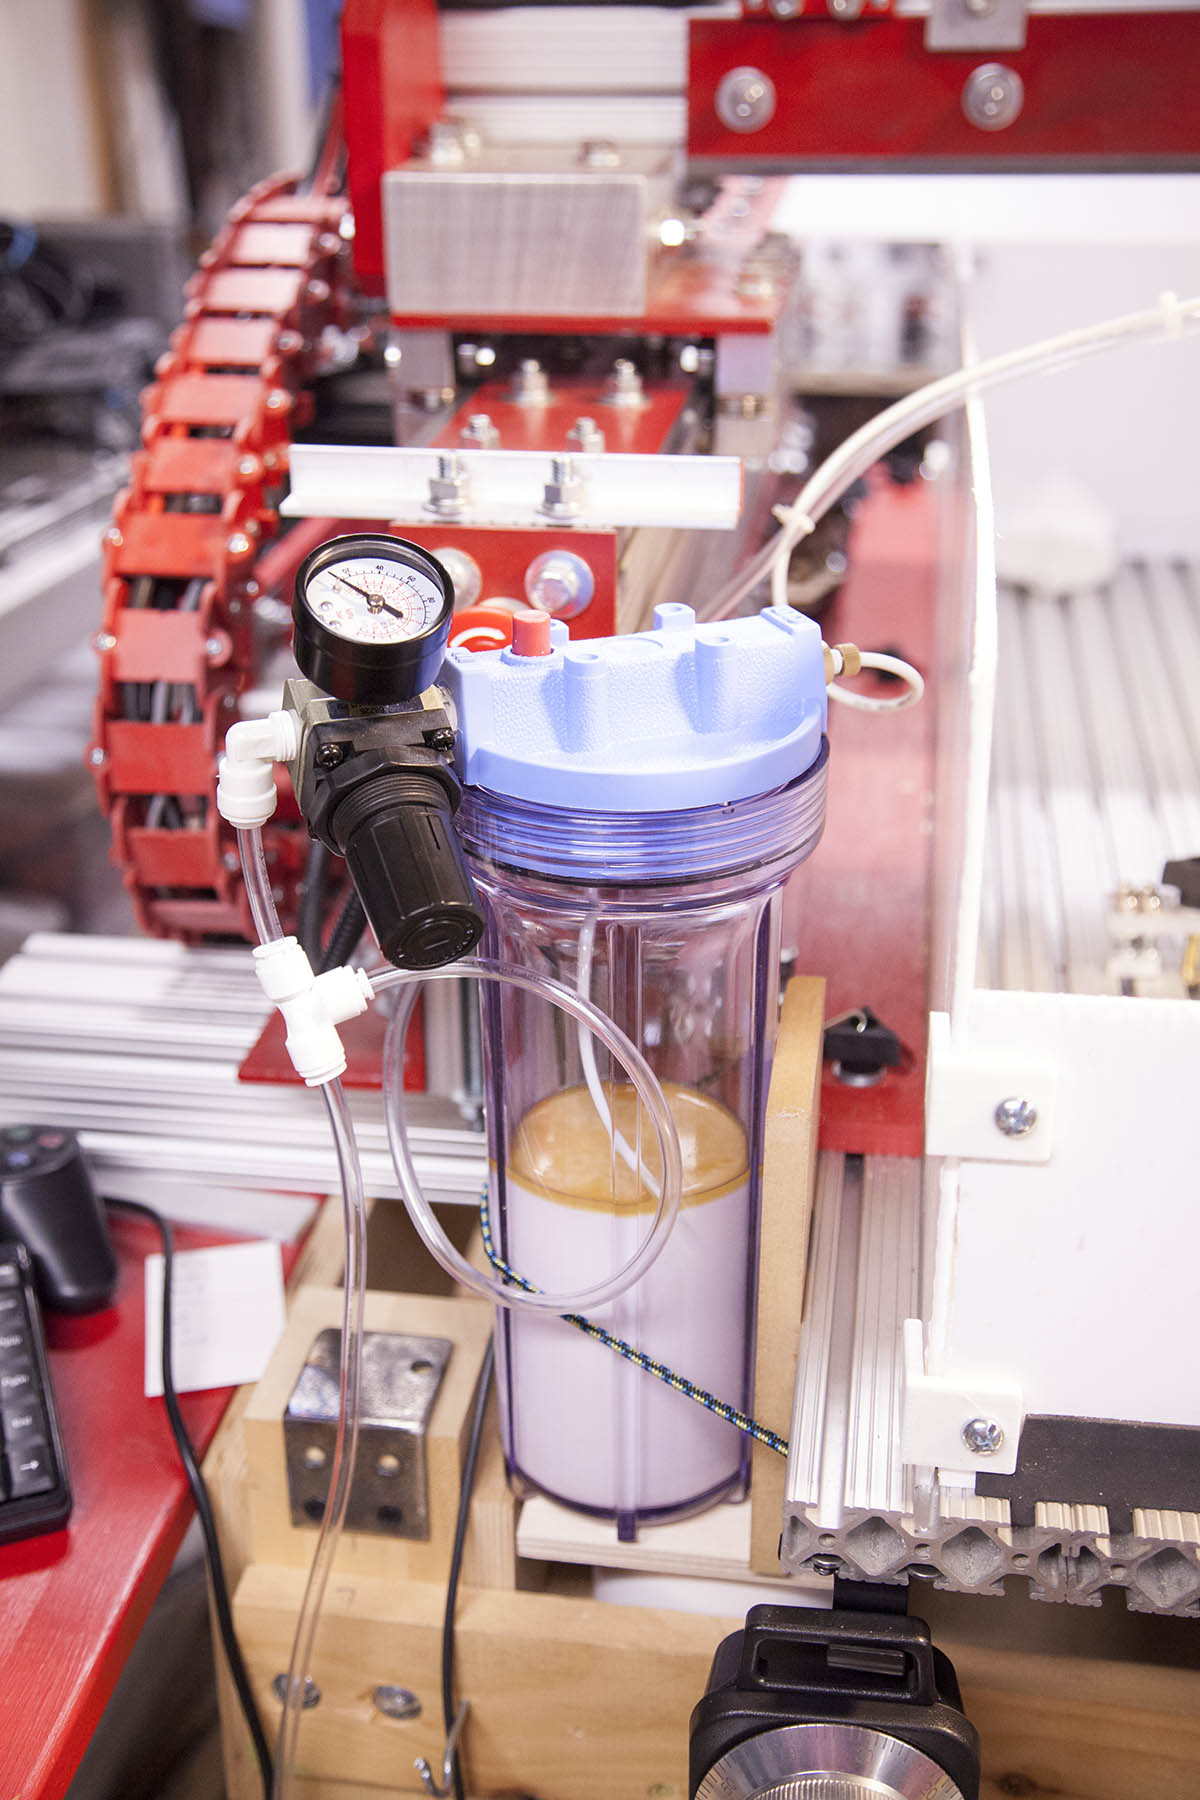
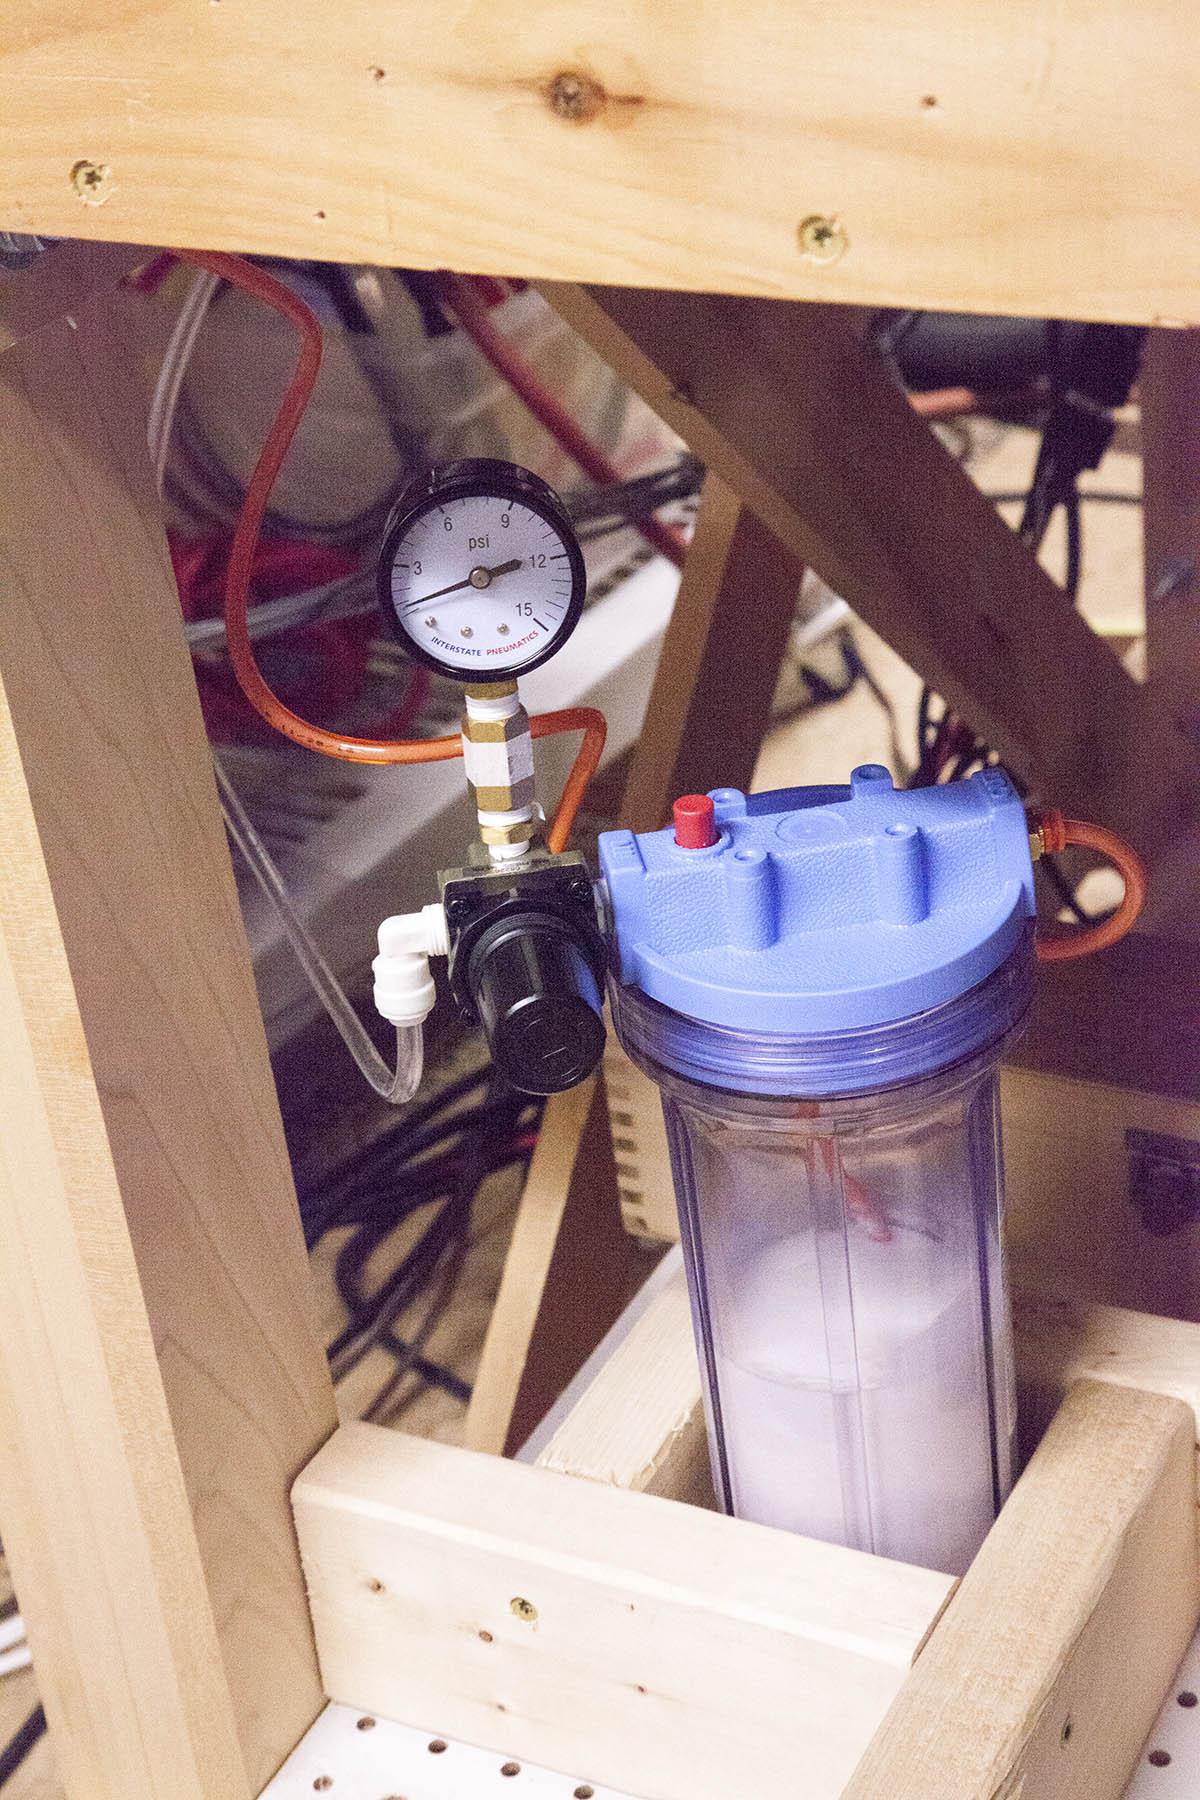


The tank is a clear water filter housing available from Amazon.
Im using a small regulator to drop the pressure down to just a few PSI.
I also replaced the gauge with a low pressure gauge to help dial-in the pressure.
Here I have it set to about 1.5 PSI.
To pressurize my coolant tank I am using a small Grex airbrush compressor.
This compressor is not a requirement, If you do decide to use the same air supply as your blower, you will need to tee it off before the blower control solenoid.
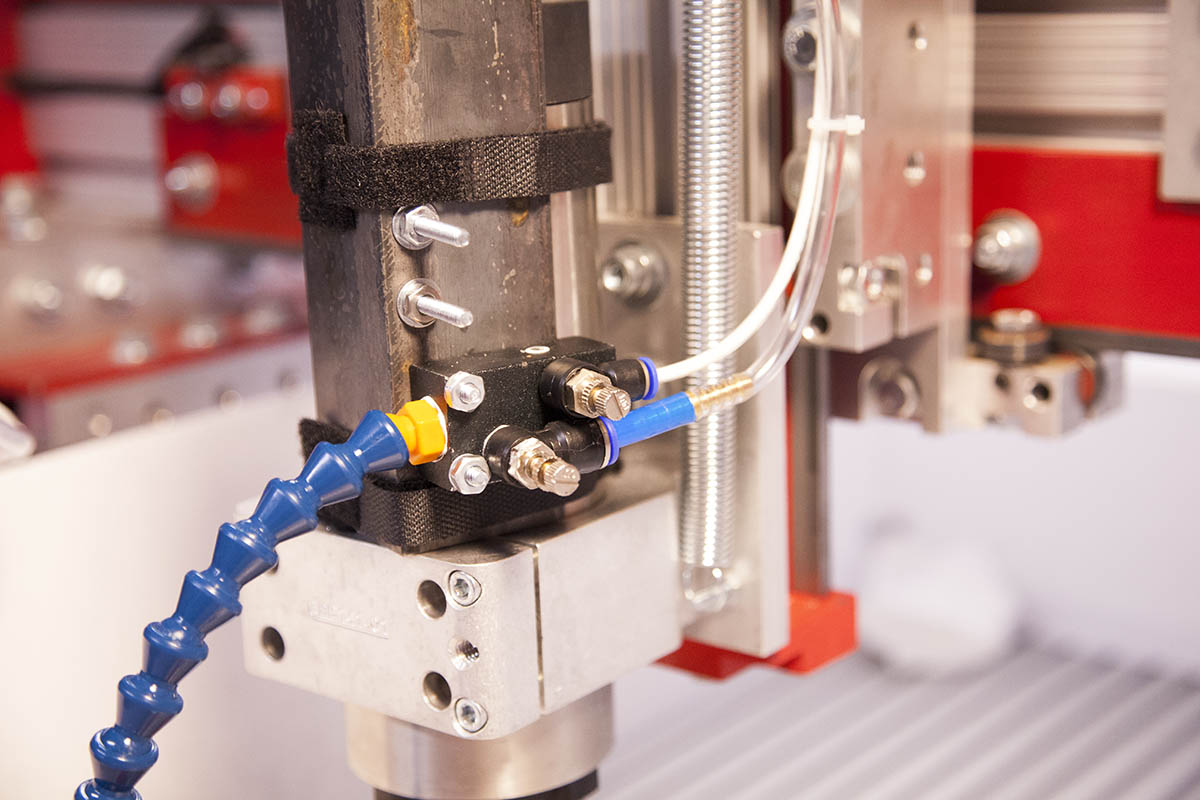
Blower Solenoid/Regulator
To control the blower I am using a regulator to bring the air pressure down to about 40 PSI. This make the air flow easyer to control at the mister valve.
To turn the blower on and off I am using a 12v air solenoid.
Coolant Solenoid
The coolant solenoid is used to pass coolant to the mister on demand.
I'm using a small 12v solenoid for this.
MQL Controller


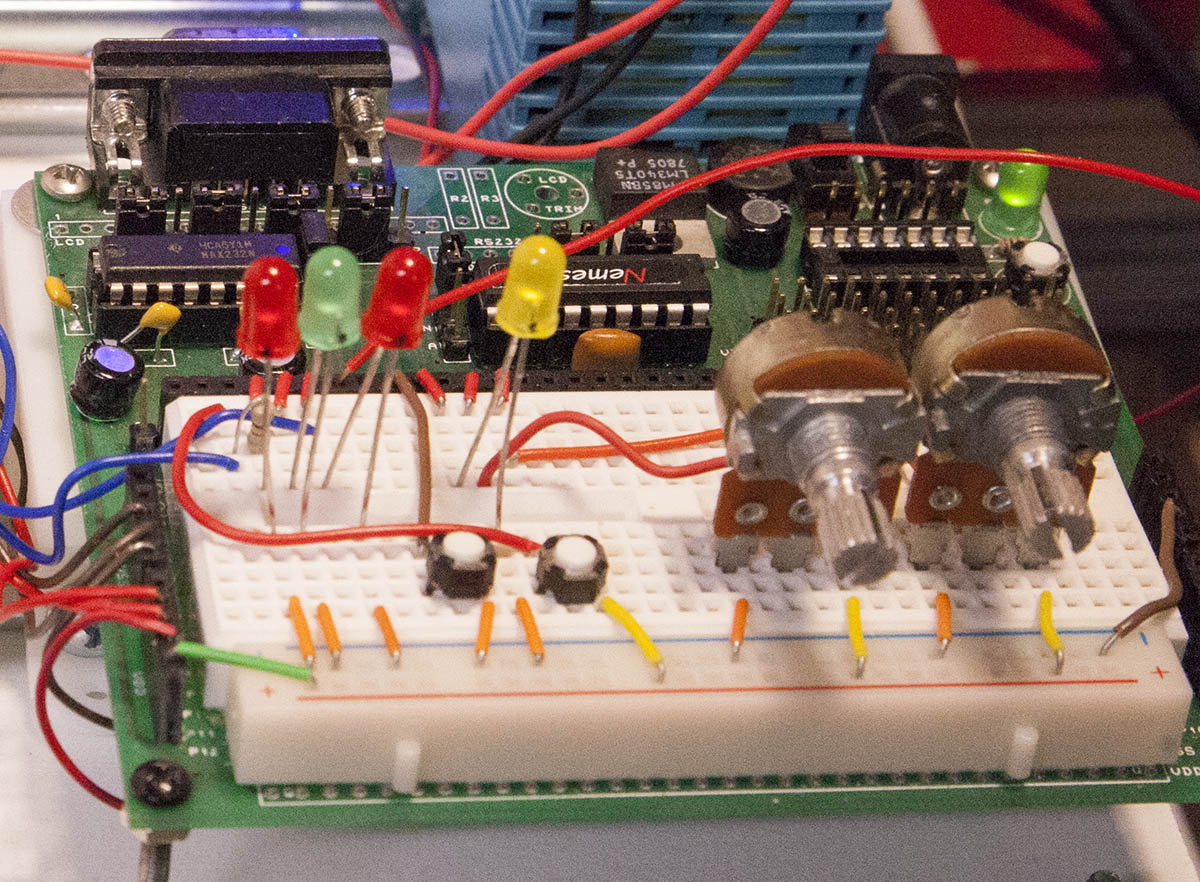
The controller is the heart of my MQL system.
It has two relay modules that control both the blower solenoid and the coolant solenoid.
To power the solenoids, I am using a DIN rail 12v 3.33A DC power supply.
DIN Rail 12V 3.33A Power Supply
In addition, to power the logic boards, I am using a small buck converter to give me 5V from the 12V supply
Buck Converter
The main logic board is my own design most of the circuitry is to provide support got prototyping. Once the design is complete I will do a much simpler board with a single chip.
Logic board operation
The logic board has two buttons. One button starts the controller in manual mode. IE it starts the blower and starts the timing of the off/on coolant solenoid. The second button is a coolant solenoid bypass. IE it lets you open the coolant solenoid anytime.
In addition to the two buttons, their is an input that when brought to ground will start the operation of the controller. It will operate as long as the pin is held to ground. This gives the CNC controller the ability to start and stop the MQL controller.
There are two adjustments on the MQL controller. The first controls the on time of the coolant solenoid from a few ms to a couple seconds. The second controls the off time of the coolant solenoid from a few ms to several seconds.
Other Parts
Please note that there are several other parts not listed here. Things like tubing, connectors, terminal strips. These are all subject to change as I tweak the design.
Update 02/28/2018
MQL and the AirExchanger
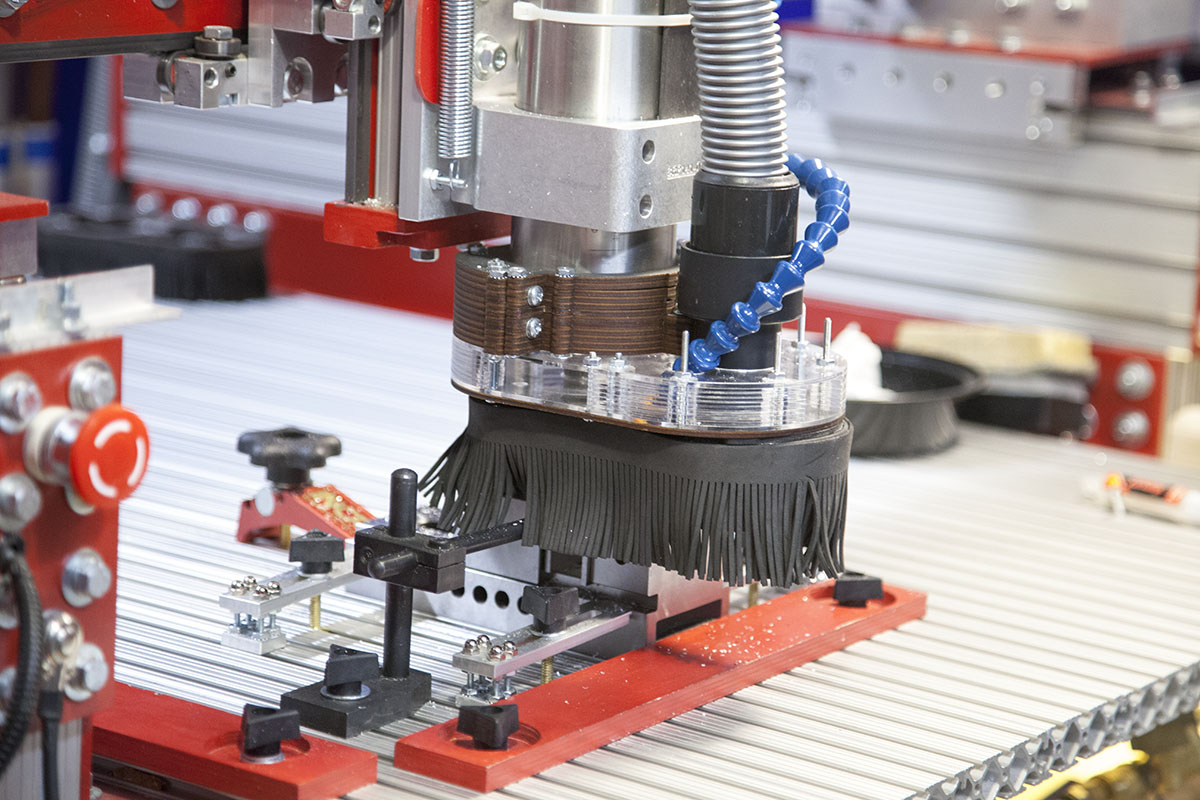
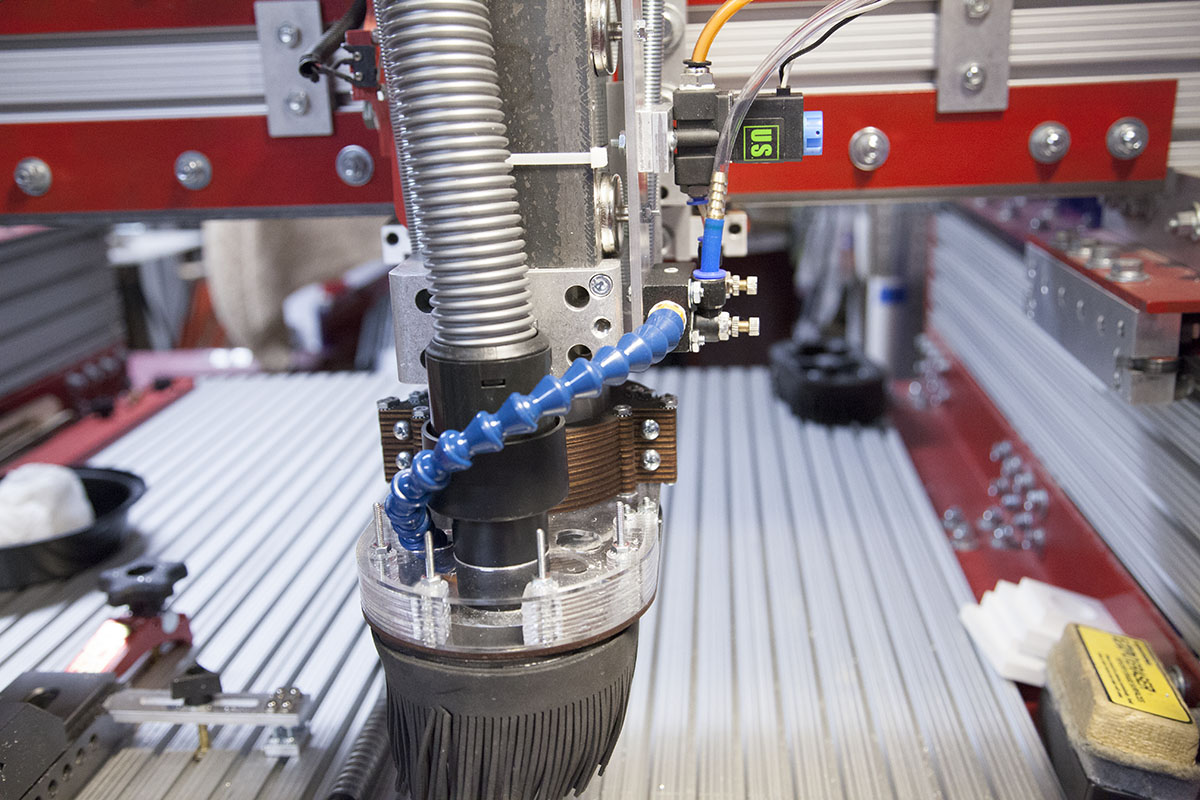

I modified my 80mm spindle AirExchanger to handle the MQL blow tube.
The tube goes down through some holes in the AirExchanger, as shown here.
The nozzle protrudes out the bottom.
This allows me to install a shroud that should keep the chips better contained.
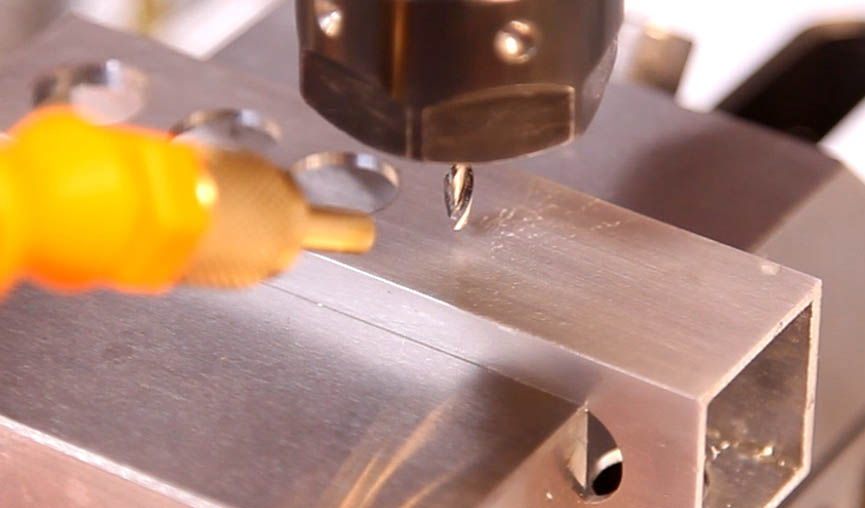
How well does it work
Here is without the shroud. I have to use a large containment system to keep the chips from being blown all over the shop.
Be for the shroud test I did a little cleaning.
With the shroud installed and the same part milled. The chips were much better contained.
The good news is that I no longer need to remove my AirExchanger, or add the containment walls when I mill aluminum.
I recently did a job where I created 10, KRmc01 Y block spacers. I must say the system ran flawlessly.