

Shelf Support Brackets.
In this installment, I will show you how to install some brackets that will be used to attach various upgrades and accessories.
The first are a set of shelf brackets shown here. These will be used later to attach your electronics layout board and other accessories.
These are also be used to hold the downdraft table later if you decide to add the plasma upgrades.
What You Will Need
8, 1/4” Washers
4, 1/4” Lock washers
4, 1/4-20 Hex nuts
2, 1-1/2” x 1-1/2” x 36” Slotted angle
Start by cutting two 1-1/2” x 1-1/2” x 36” pieces of slotted steel angle down to 35-1/2”
If you plan on painting your accessory brackets, you need to do so before you attach them.
Place the slotted steel angles against the inside of the the legs, as shown here. Use the square holes located about 10-1/2” from the top of the leg.
Use 4, 1/4-20 x 3/4” hex bolts and washers to secure the steel angle to the legs. Secure each bolt with a washer, lock washer, and 1/4-20 hex nut.
The shelf support installed on one of my machines.
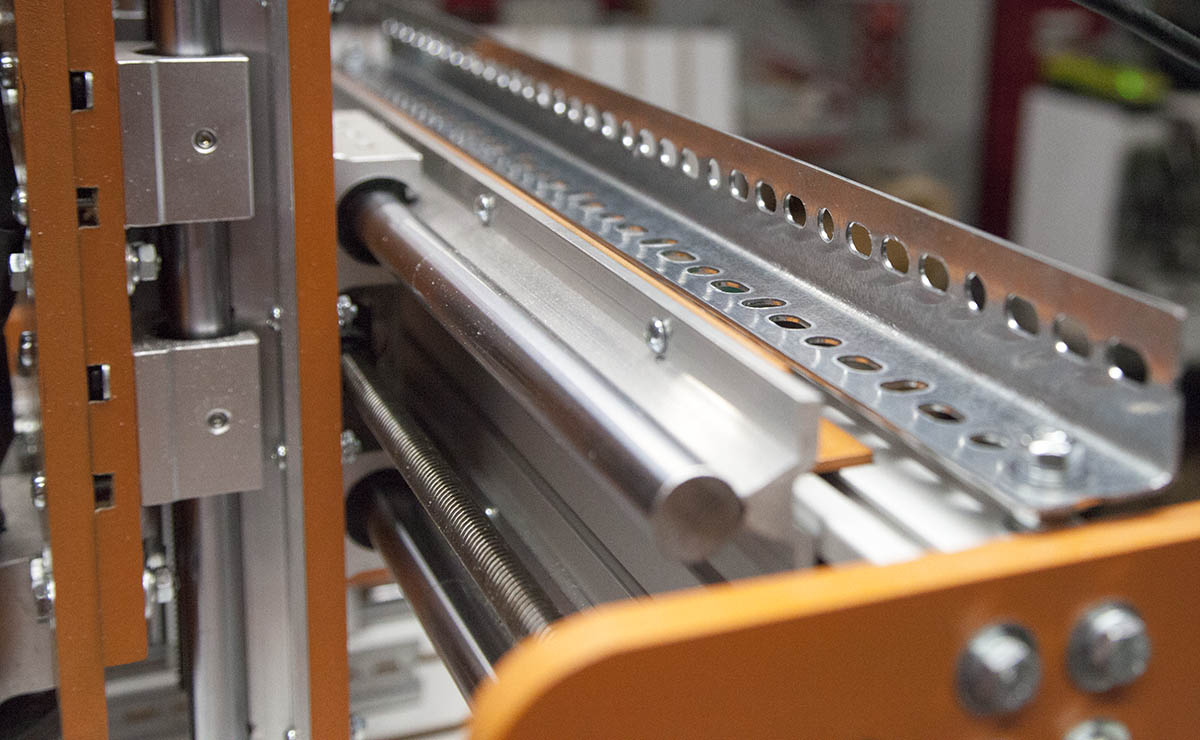
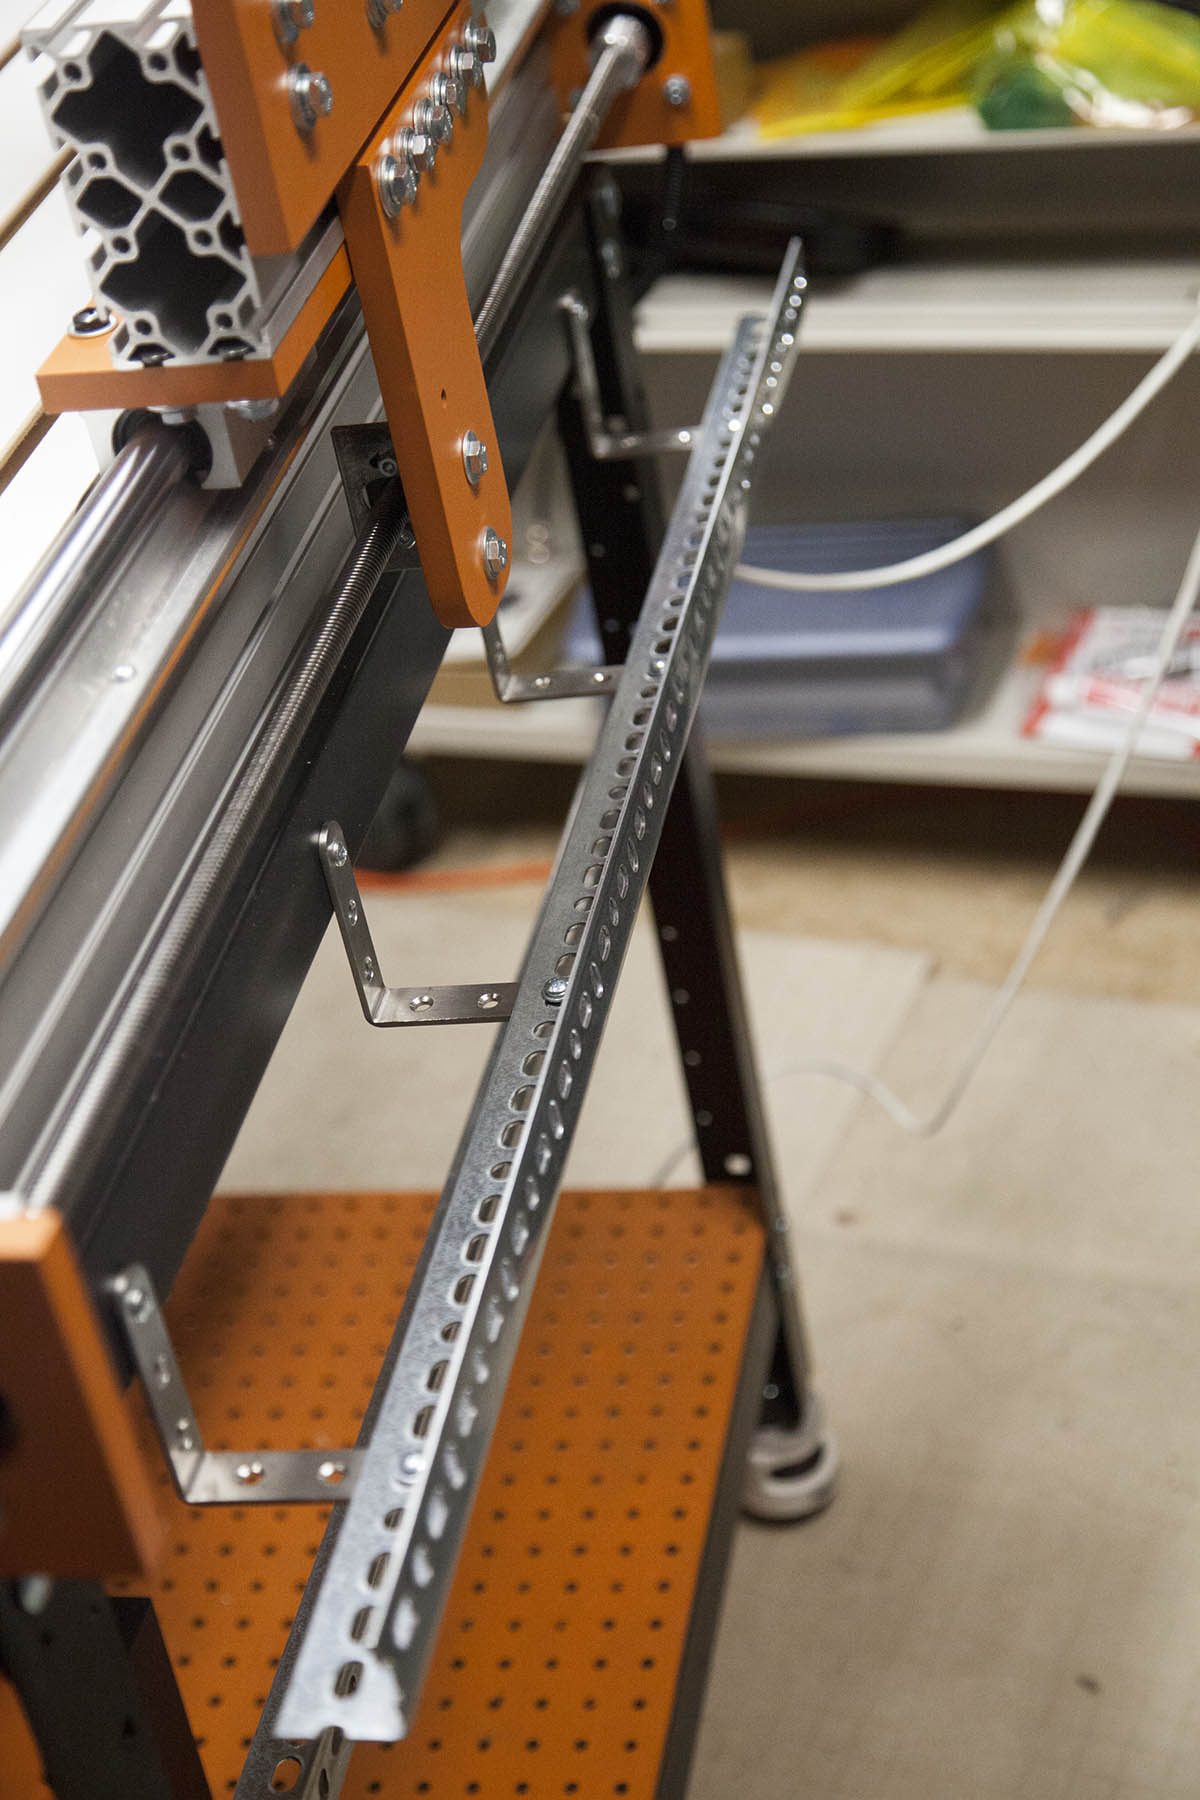
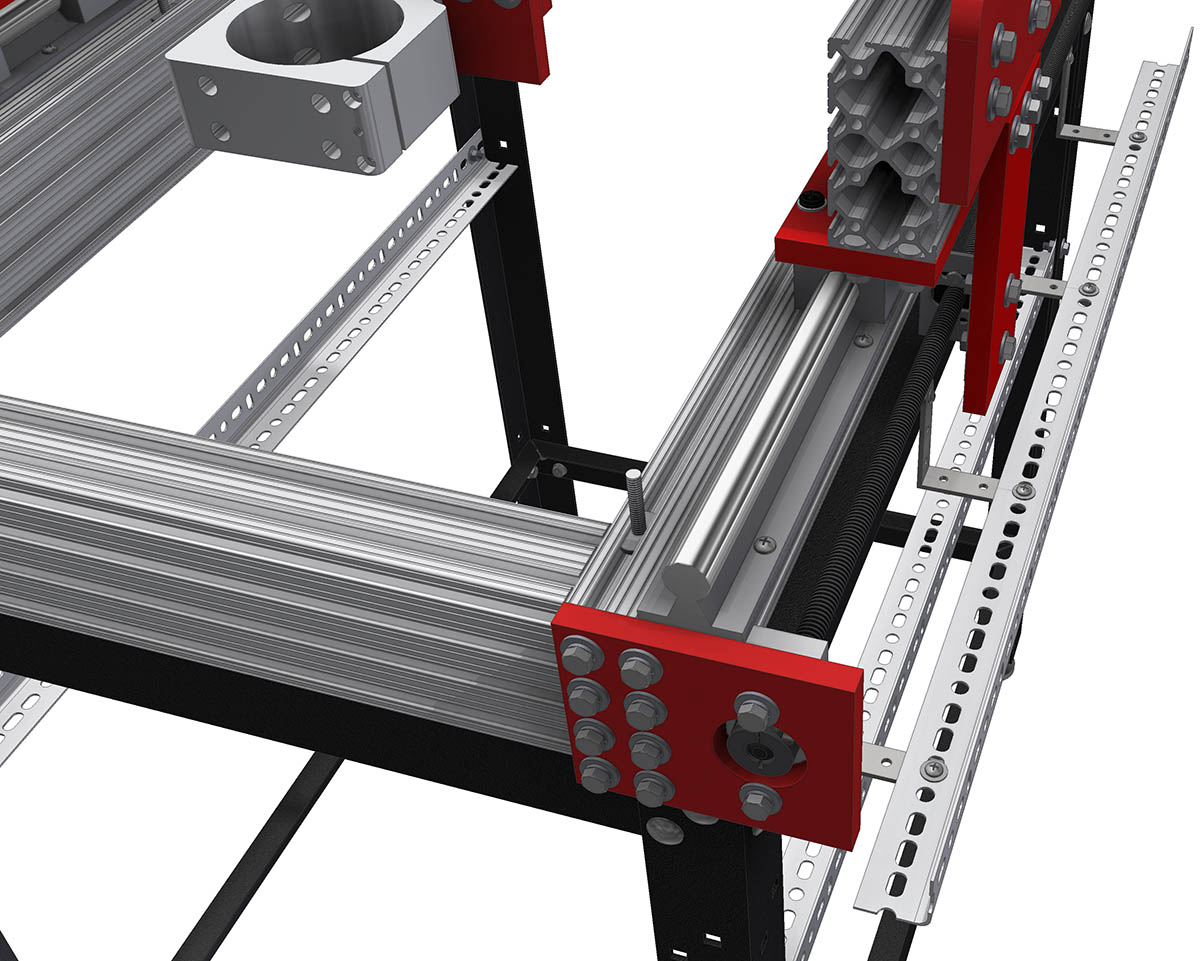
Upper Accessory Bracket

The upper accessory bracket sits on top of the gantry behind the Z-axis. Its primary purpose is to provide a support for the upper E-chain (X-axis) which is used for cable management.
What You Will Need
4, 1/4” Washers
2, 1/4” Lock washers
2, 1/4-20 Hex nuts
1-1/2” x 1-1/2” x 36” Slotted angle
Start by cutting a 1-1/2” x 1-1/2” x 36” piece of slotted steel angle down to 27”.
In chapter 8 of volume 2 you added two 1/4"-20 x 1” carriages bolts to the top of the gantry.
We are going to use these to mount the upper accessory bracket.
Start by placing a 1/4” washer on top of one of those bolts as shown here.
Place the cut slotted angle over the two bolts.
Add 1/4” washers to the bolts.
Add a 1/4” lock washer to the bolts.
Secure with a 1/4-20 hex nut.

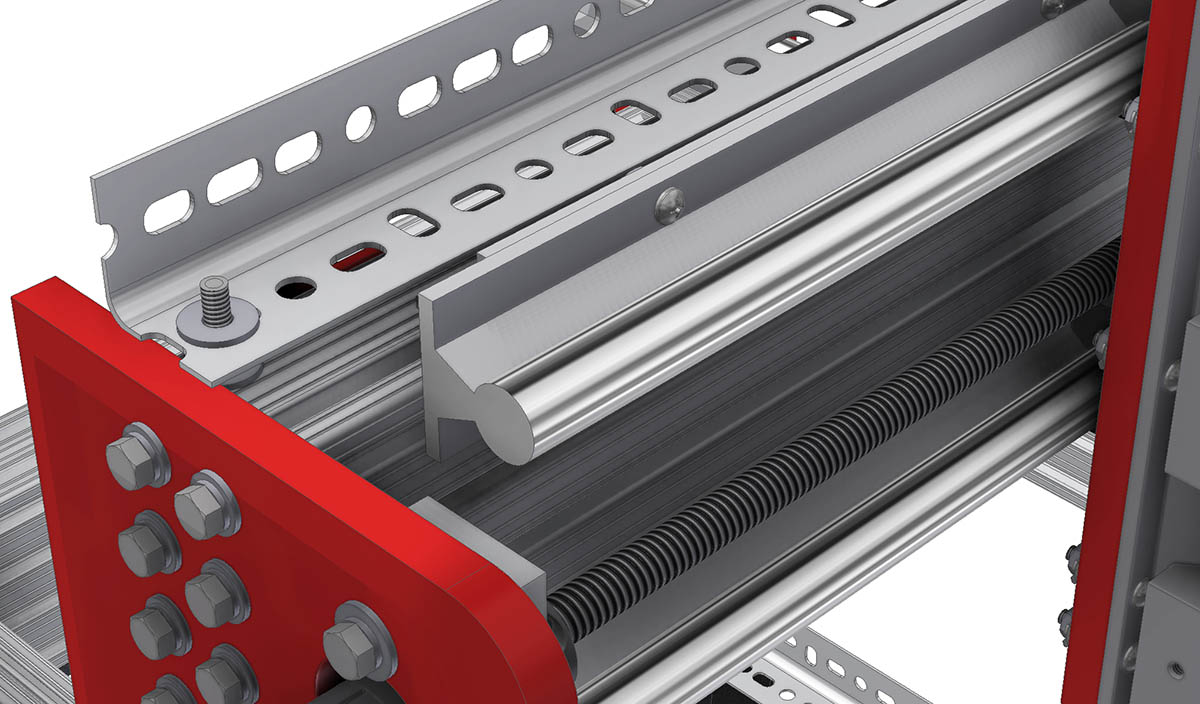
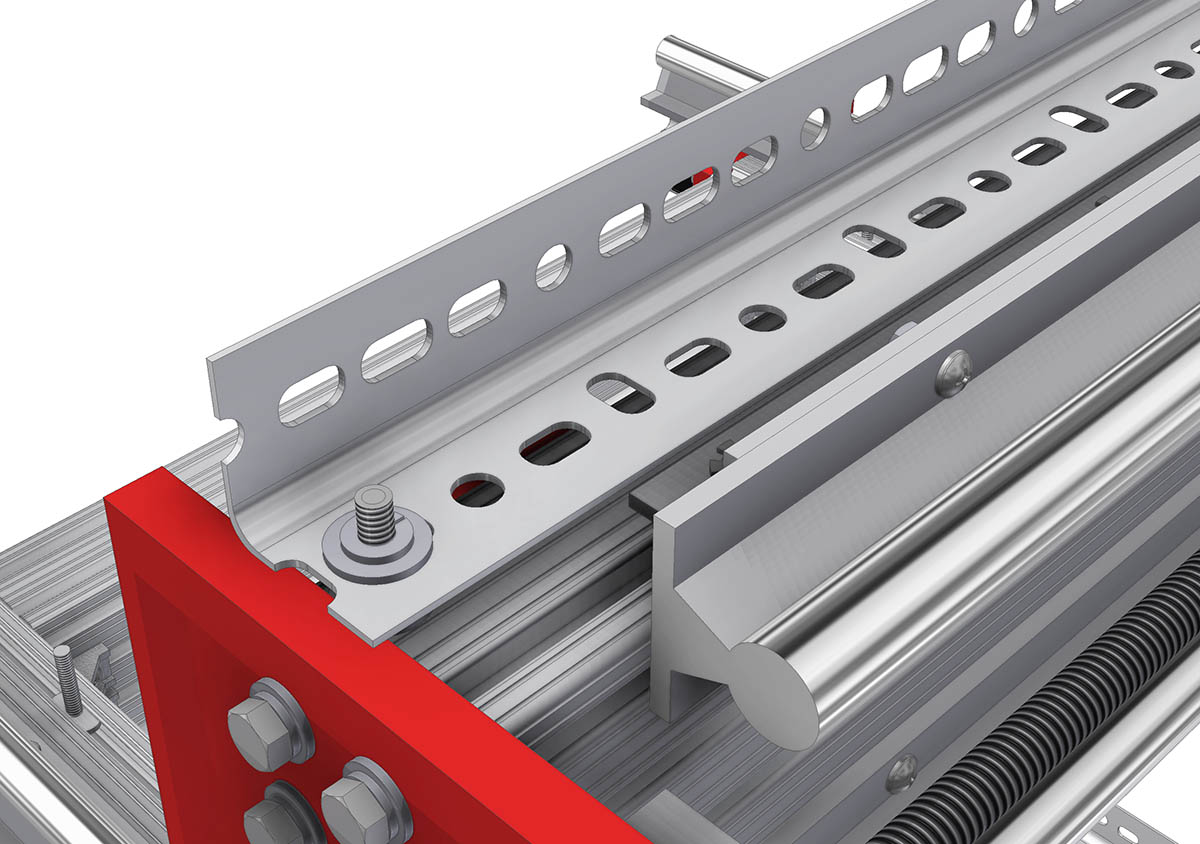
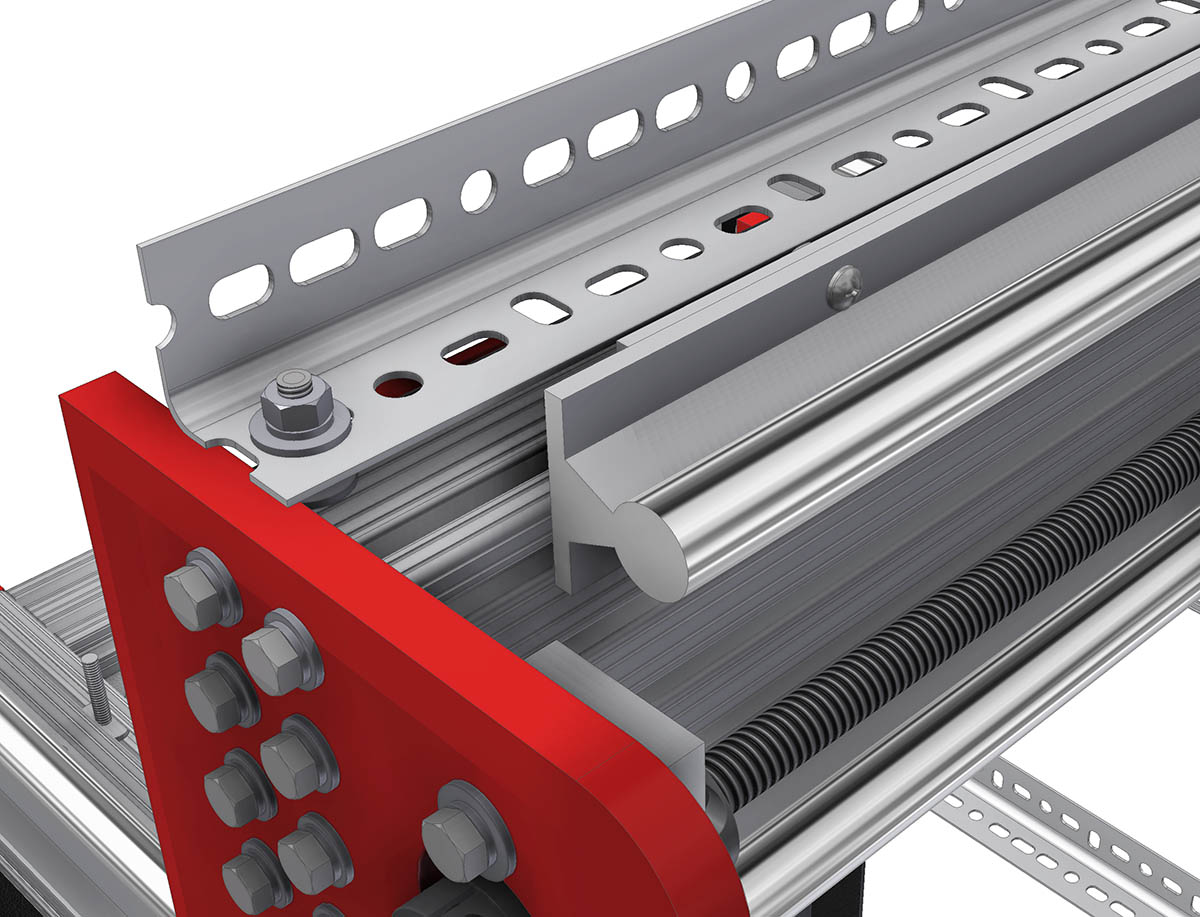
The installed bracket.

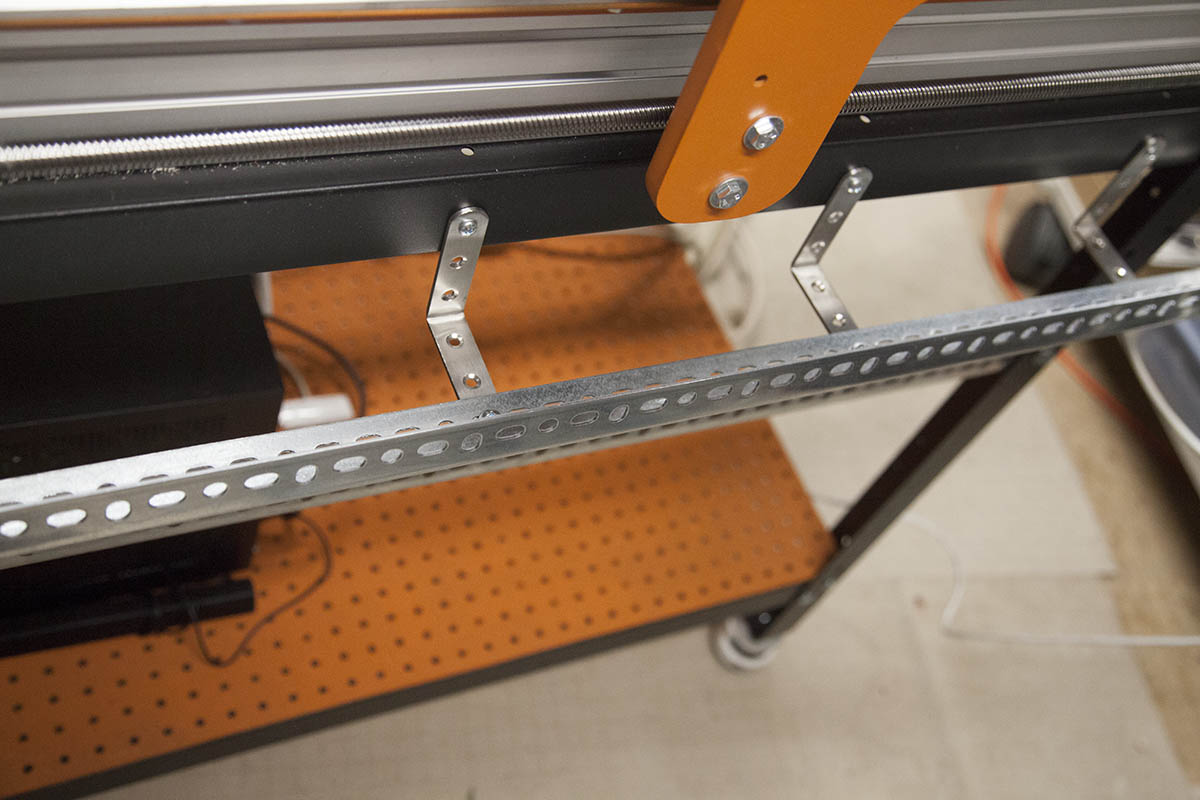
Lower Accessory Bracket
The lower accessory bracket is attached to the right side of the stand. Its primary purpose is to provide a support for the lower E-chain (Y-axis) which is used for cable management.
What You Will Need
8, #10-32 x 1/2” Machine screws
12, #10 Washers
8, #10 Lock washers
8, #10-32 Hex nuts
1-1/2” x 1-1/2” x 36” Slotted angle
There are four holes on the top right side rail. These need to be enlarged with a 3/16” drill bit.
Attach 4 angle brackets to the four holes as shown here.
Use #10-32 x 1/2” machine screw, #10 washer, #10 lock washer, and #10-32 hex nut to secure the brackets.
While you can use just about any 3” angle bracket, I recommend the ones shown here as they are stainless steel and extremely strong.
Set the 36” piece of slotted angle on top of the brackets. Slip #10 washers on the four #10-32 x 1/2” machines screws and slip into the holes in the slotted angle.
Secure with another #10 washer, #10 lock washer, and a #10-32 he nut.
Note that exact placement is not necessary.
The installed bracket.
Conclusion
That’s it. We will be utilizing these brackets in the next couple upgrades.