

Back when I designed the KRMx02, the K2CNC mounts were readily available, so they were chosen as the mount of choice at the time.
The K2CNC mount shown were very popular a few years ago. Even companies like CNCRouterParts were using them at the time.
However over time they have been harder and harder to find. Another company called Velox are stocking a couple mounts that are compatible with the K2CNC mount so they will work as well on the KRMx02.


CNCRouterParts started manufacturing their own mounts, I will show you how to use these mounts with no changes to the KRMx02 CNC design.
CNC Router Parts currently sells mounts for the following routers/spindles:
- Bosch 1617
- Bosch Colt
- Dewalt DW618
- Dewalt DWP611
- Hitachi M12V
- Makita RF1101
- Porter Cable 690/892
- Porter Cable 7518
- 80mm Spindle
- 100mm Spindle
Please note that you do not need the CNCRP base plate. You can pickup the basic mount for about $82 here:
I cover the use of the CNCRP adapter plate instead of the Z-Plate at the end of this article. The tramming plate is not recommended but is covered as well.
The main problem with mounting the CNCRP mounts to the KRMx02 Z-plate is that the mounting bolts used to mount the Z-plate to the Z-beam tend to come in contact with some of the routers. You have a couple choices to solve this.
The first is to remove both the washer and lock washers as shown here:
By removing the washers, I was able to mount most of the routers. Just make sure you add some locktite to the bolts if you go this route.
You can also use some T-slot inserts and switch to pan head bolts.
You could also add some counter sinks to the Z-plate so solve the issues.

What I decided to do was to add a 1/4" spacer to the Z-plate.
This spacer is 5" x 2" x 1/4". It can be made from aluminum or steel.
The drawing/template can be found here for this spacer:


To make the space, start with a piece of stock 5" x 2" x 1/4" in size.
Print and cutout the template.

Tape the template to the spacer as shown, and mark each hole with a auto punch.

Use a 1/8" drill bit to drill pilot holes on each mark.

Enlarge each hole to 7/32"

Ream the edges of the holes and then give it a light sanding to complete the part.
Note, I like to use 120 grit paper on a orbital sander to give it a brushed surface. This also helps when bolting to pieces together as they dont slide as much.
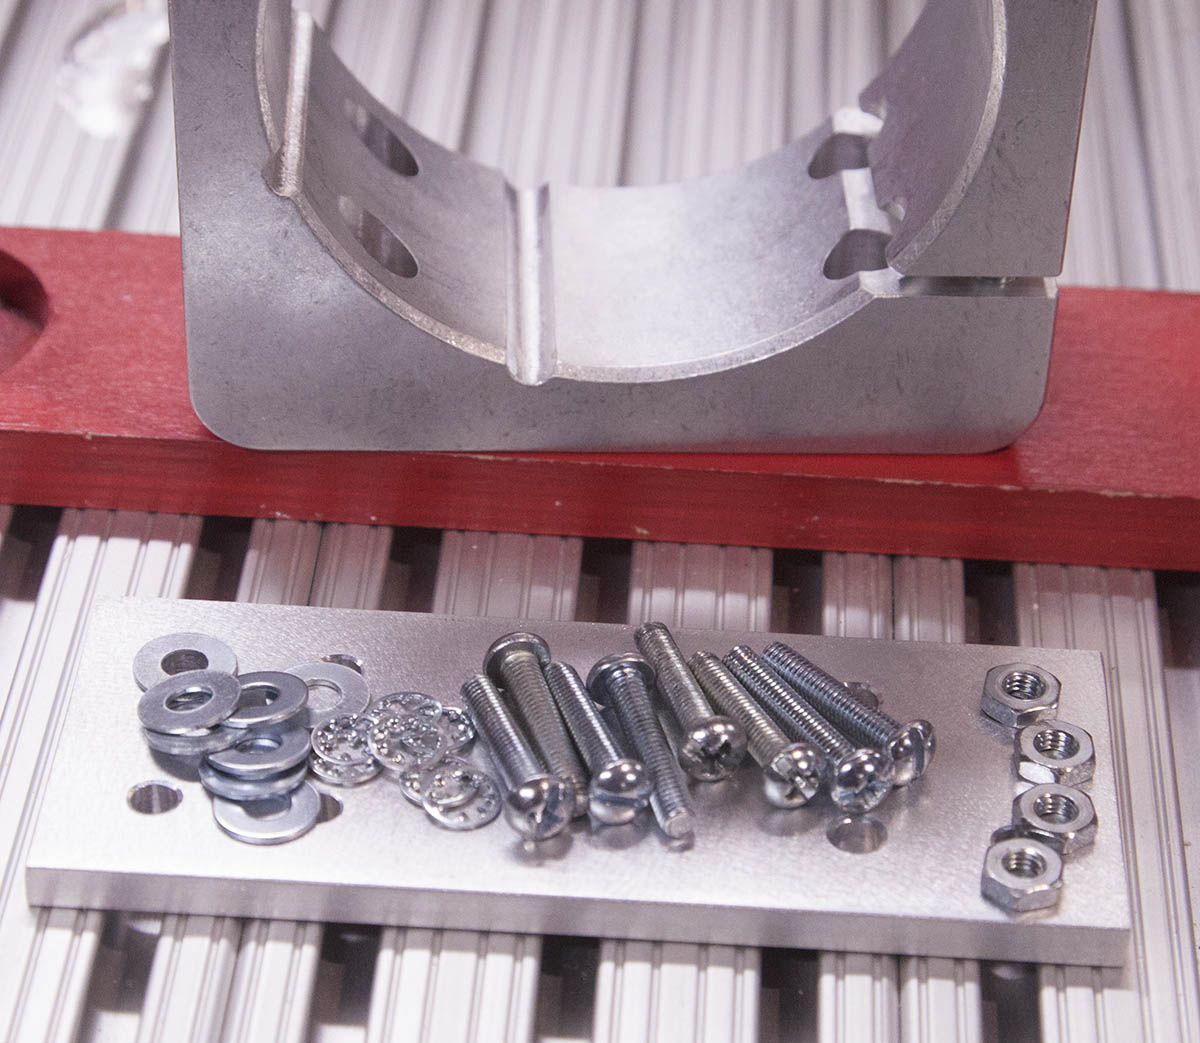
You will need the following hardware:
- 8, #10-32 x 1" machine screws
- 8, #10 flat washers
- 8, #10 internal tooth lock washers
- 4, #10-32 hex nuts

Attach the spacer to the Z-plate using four #10-32 x 1" machine screws. Each machine screw should have a flat washer on the front, and a flat washer, lock washer, and hex nut on the back.
Center the four holes in the center over the four tapped holes on the Z-plate and tighten the nuts.
Secure the mount to the Z-plate by adding a lock washer to each of the #10-32 x 1" machine screws and inserting into the holes at the rear of the mount. Through holes have been added to the front that will let you insert a screwdriver, as shown here.


Use a square to square the mount to the table as shown here.
Install your router and tighten the two hex head bolts on the front of the mount.


The AirExchangers work perfectley with this new mount.
Please note that while the AirExchanger is compatible with the CNCRP mounts. I currently only make mounts for the following routers:
- Bosch 1617EVS
- Dewalt DW688
- Hitachi M12V
- Makita RF1101
Once your router is attached you can follow the KRMx02 work books for router hookup and operation. Also note that The Z-plate will still work with the Z-axis homing switch, as detailed in the KRMx02 upgrade workbook.
CNCRP Adapter Plate
CNCRouterParts sells an adapter plate that you can use instead of my Z-Plate. It bolts to the Z-beam using its included hardware.
The spindle/router mount then attaches to the adapter plate using hardware included with the plate as shown here.
The adapter plate is thick enough and has enough side to side adjustment that you can use the adapter plate as a striker to activate the switch as shown here.
The problem with using the adapter plate directly is that you loose some router height adjustability.
By cutting a small piece of aluminum angle 3" long and adding a little slot on one end, will allow you to add an adjustable striker plate.
The striker is held in place with a #6-32 x 1" machine screw through a hole that's already in the lower left corner of the adapter plate shown here.
You can lengthen the length of the slot or size of the striker as needed.
This allows you to adjust the adapter plate/mount up and down and then adjust the striker as needed.
CNCRP Tramming Plate

I don't recommend the use of the CNCRP tramming plate on the KRMx02, as the same adjustments are already available.
I am providing these photos only for the sake of completeness.
You start by installing the tramming plate on the Z-beam as shown. The mounting screws are the same ones used on the adapter plate and are included with the adapter plate.
I use a square to square this plate with the table

Secure the adapter plate and mount to the tramming plate as shown.
The M8 shoulder bolt goes in the upper left hole.
The eccentric nut and M8 x 35mm bolt goes into the lower right hole as shown.
The two remaining M8 x 30mm bolts go into the lower left and upper right holes as shown.
Insert the included dowel and tighten the bolts. Be sure to remove the steel dowel once the bolts have been tightened.

Install your router by tightening the two bolts on the front of the mount.
Note that the tramming plate now becomes the striker for the homing switch.
If you need to tram across the X axis (X tilt), slightly loosen the four bolts and adjust the eccentric nut.
If you need to tram across the Y axis (Y tilt), you will need to use shims between the adapter plate and tramming plate.
The instrictions for the CNCRP mounts can be found here:
CNCRP Spindle/Router Mount instructions
To tram the KRMx02 Z-plate of the CNCRP adapter plate, you can make the same adjustments without the complexity of the tramming plate.
To adjust the tram across the X axis, slightly loosen the four bolts securing the plates to the Z-beam and twist the plate until you achieve the desired tilt. Re tighten the bolts.
To adjust the tram across the Y axis you will need to add small shims between the plate and the Z beam. In most cases this will not be needed.