

In this project I am going to make a cool little project that your kids will love. It's a very simple CNC project that's not only fun to build, but simple enough to be a first time project.
Tools
You will need a 1/8" two flute router bit and a 60 degree V bit. You will need a way to cut the stock. A table saw or band saw works best for this.
You will also need some 220 grit sandpaper. A fine sanding sponge will do the job.
A rotary tool such as a Dremel will be needed to remove the small tabs once the eyes and mouth have been cut and removed.

The Design
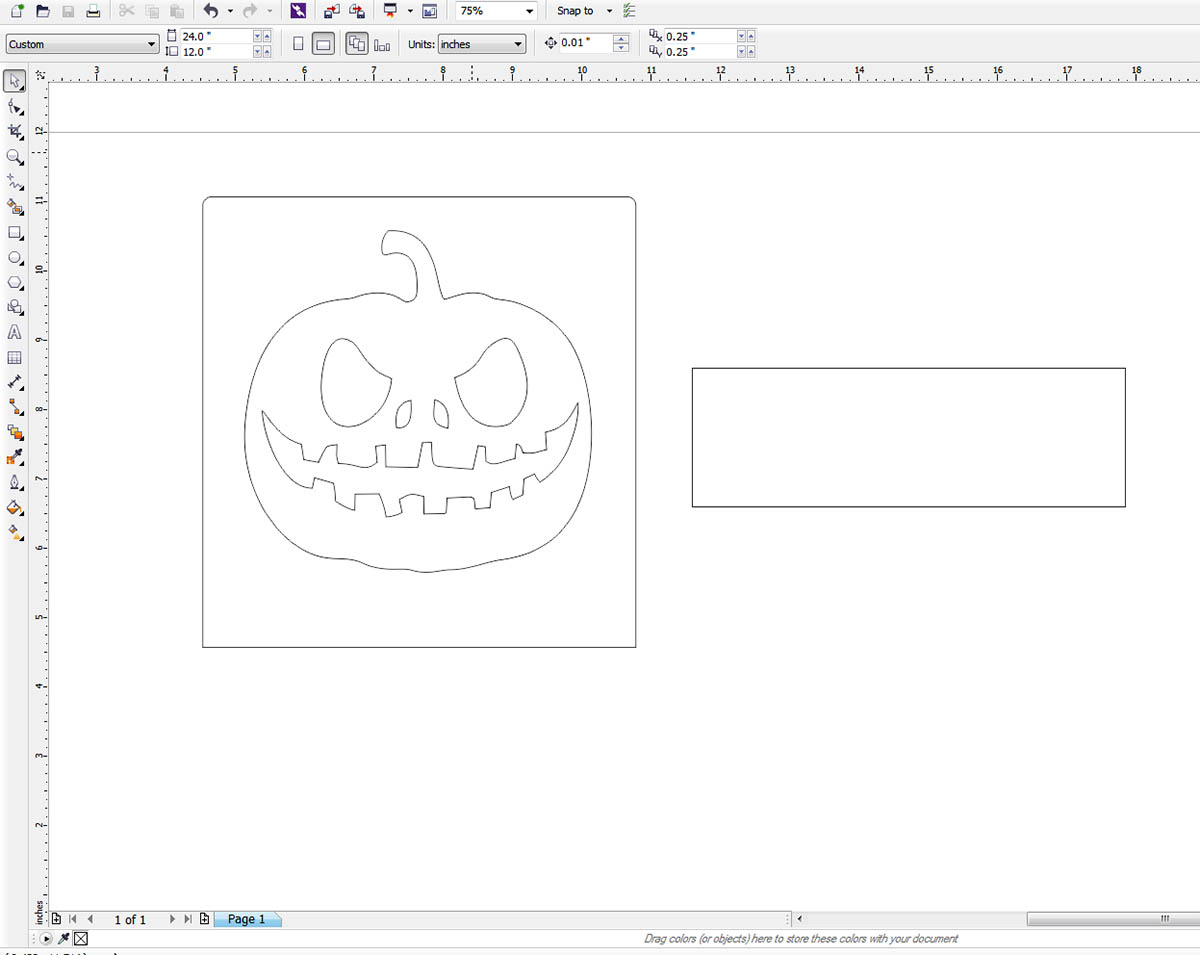
I designed the project in Coreldraw and used Vcarve Pro as my CAM software.
While I am supplying the G-code I am also providing the drawing files so you can make modifications if you wish.
You will need two of the pumpkin face files.
Step 1

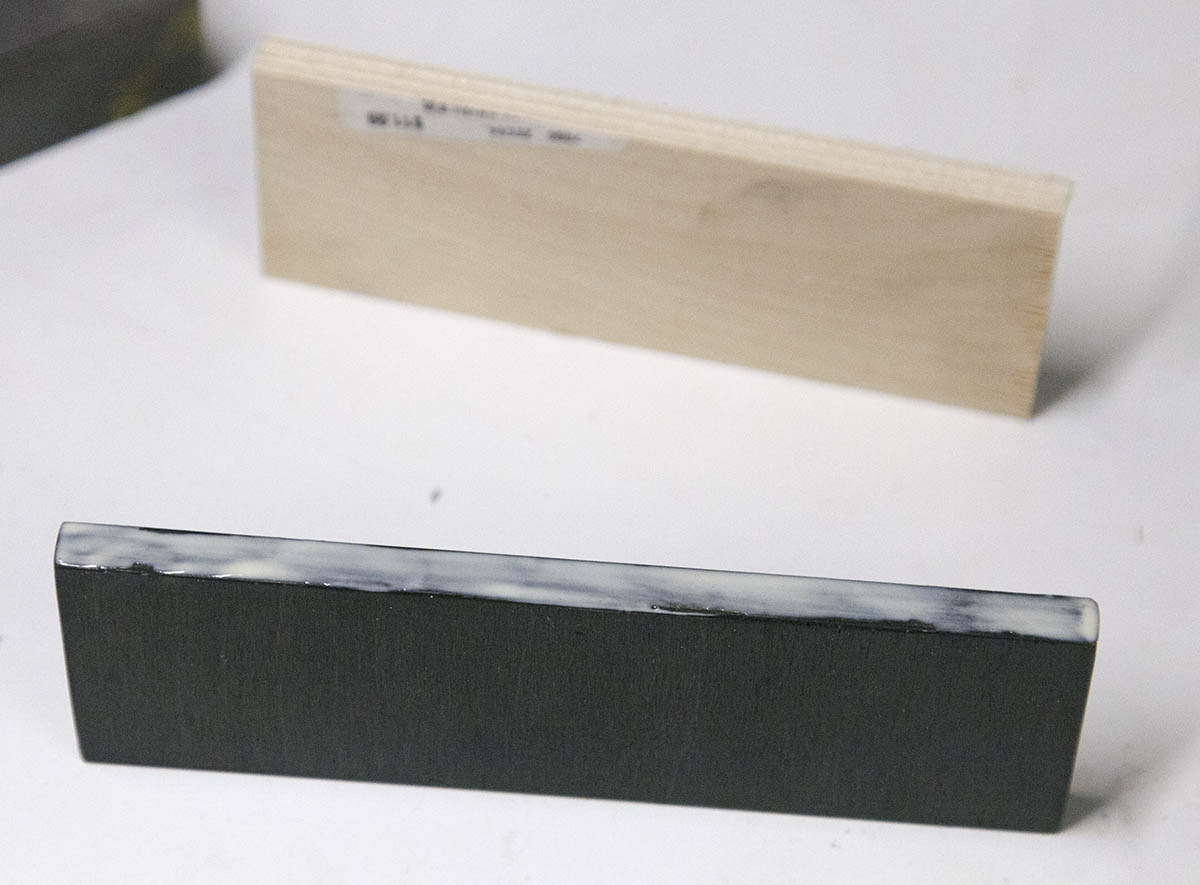
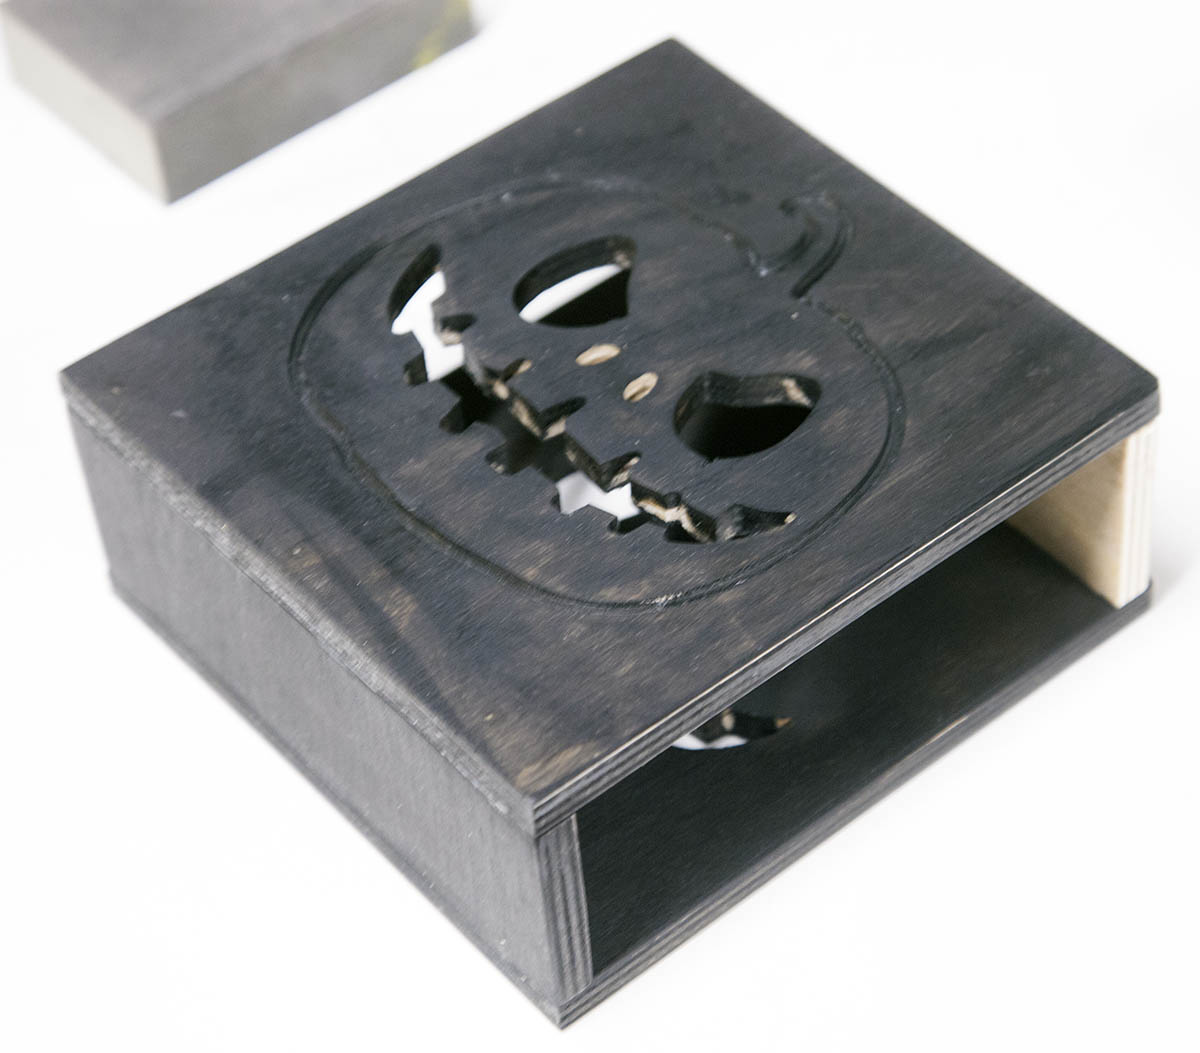
The napkin holder is made out of three pieces of baltic birch.
The baltic birch is 3/8" (23/64") thick. The two larger pieces are 6-1/2" tall by 6-1/4" wide. The smaller piece is 2" deep by 6-1/4" wide.
Cut the pieces to the sizes indicated above.
Step 2
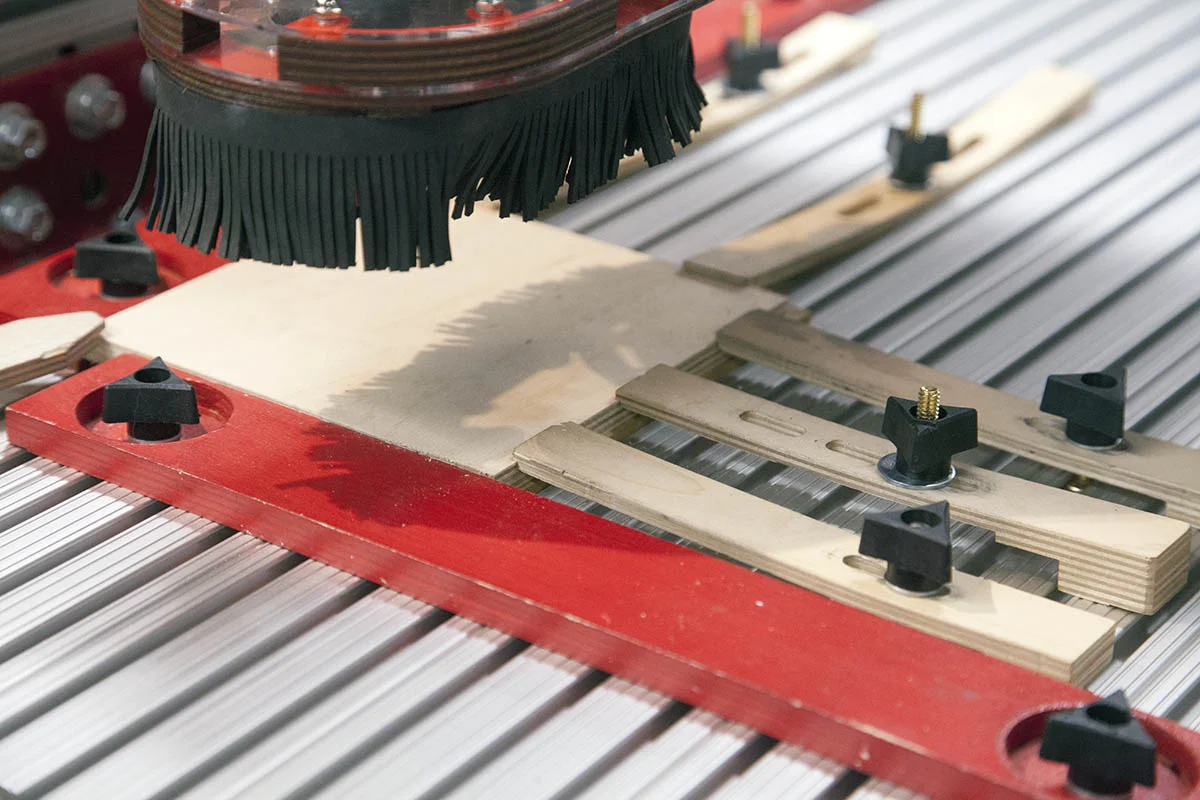
You will need some waster board that is close to the size of your stock. Place it under your stock to protect your table as we will be cutting through.
Clamp the stock with the 6-1/2" edge along the Y-axis as shown here.
Make sure your router is zeroed at the lower left corner of the stock. Here I am using fences, so its as simple as clamping the stock and hitting the home all button.
Step 3
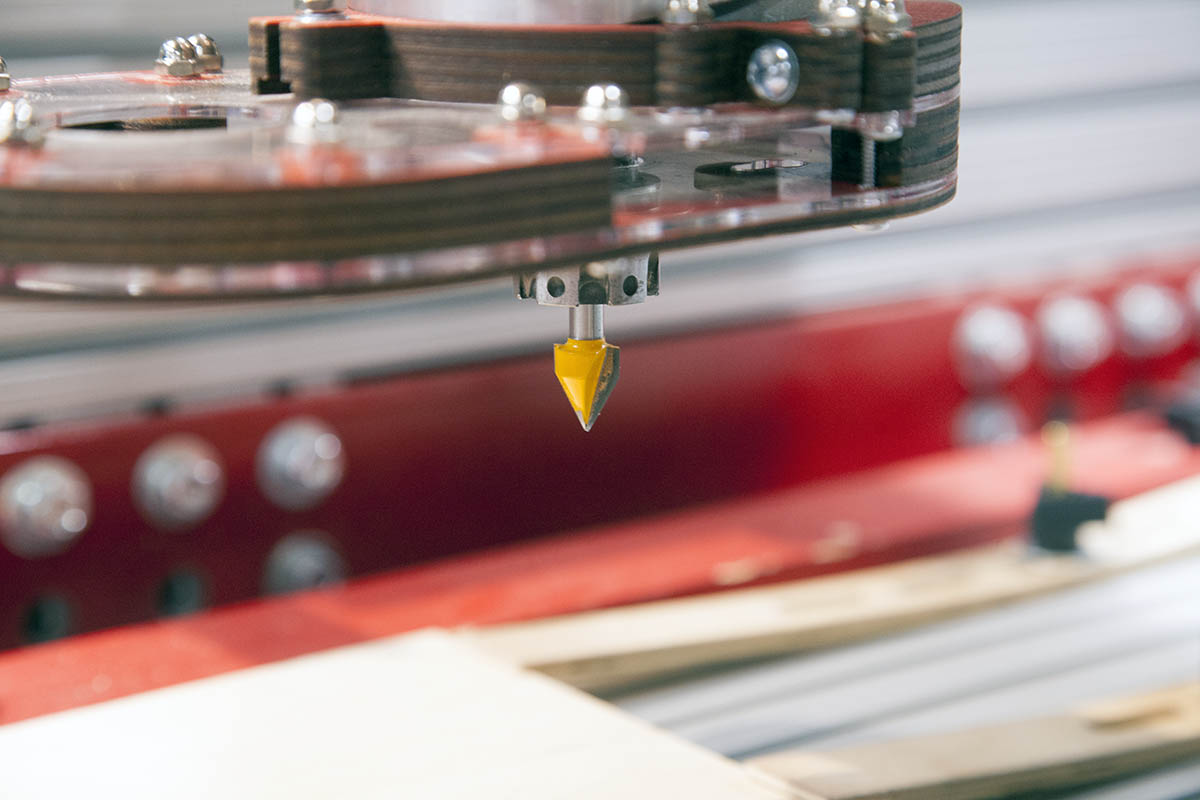
Insert a 60 degree V-bit into the router and zero the tip against the top of your stock.
Step 4
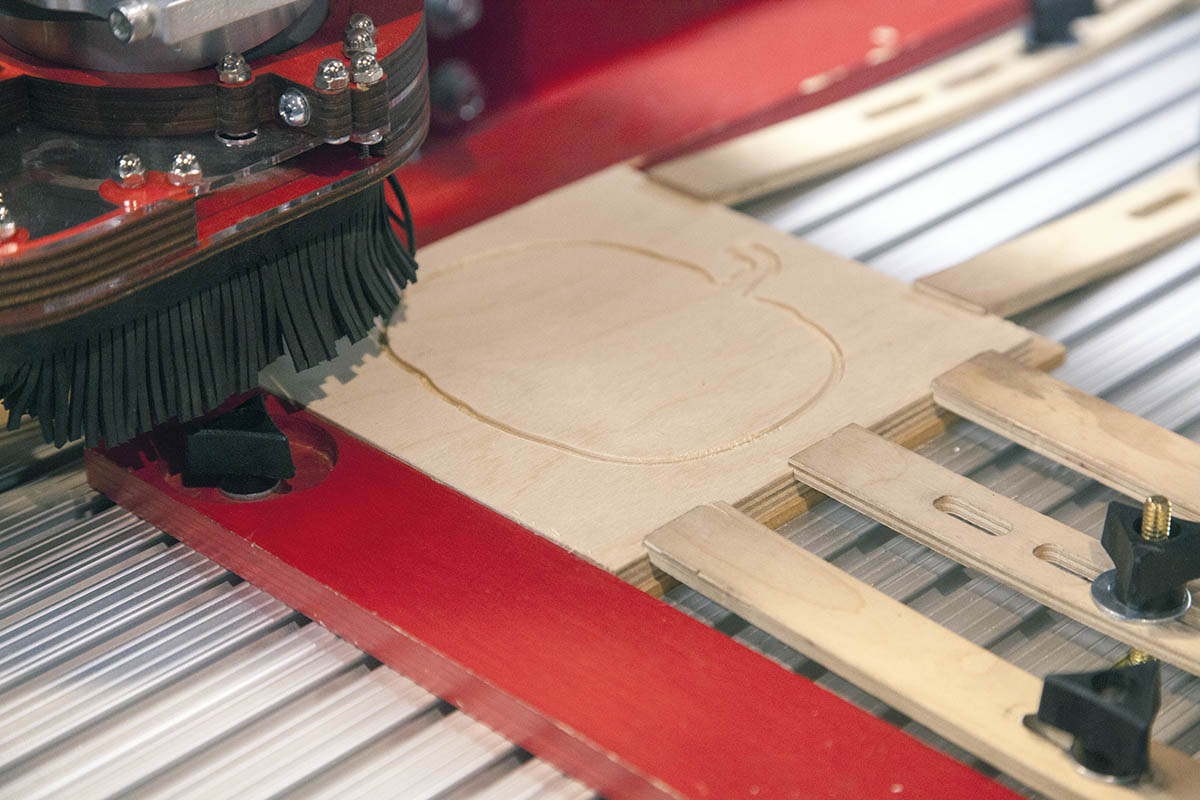
Load the G-code file labeled "main vcut.txt" and run the job. If your machine does not control the router speed, you need to set it to about 16000 RPMs.
Also if your machine does not turn the router on and off, make sure you turn it on before starting the job.
The Gcode is set to run the groove at about 50IPM. This will give somewhat of a rough groove depending on your bit. Make a second pass and override the the speed to about 25IPM to clean up the cut.

When the Job is complete, remove the stock and insert the other side component and repeat the process. You wont have to re-zero the axis or the stock.
Step 5

Remove the V-bit and insert the 1/8" spiral router bit. Zero the bit against the top of the stock.
Step 6

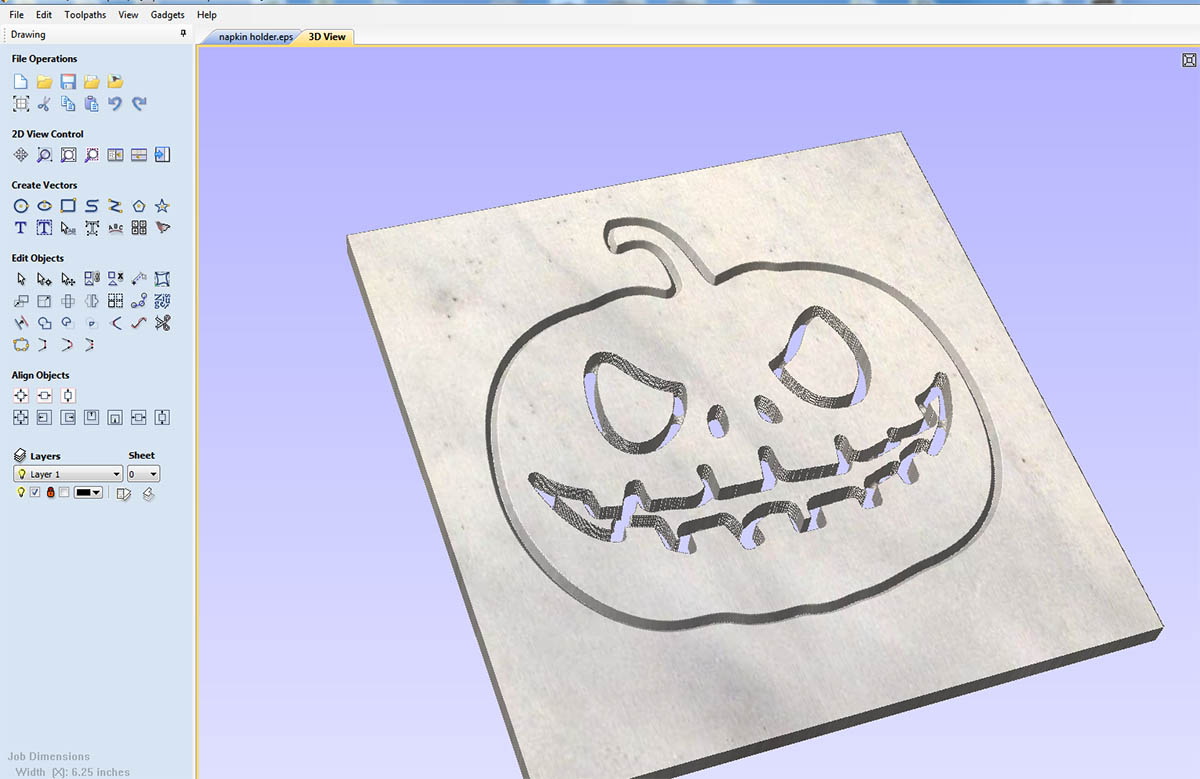
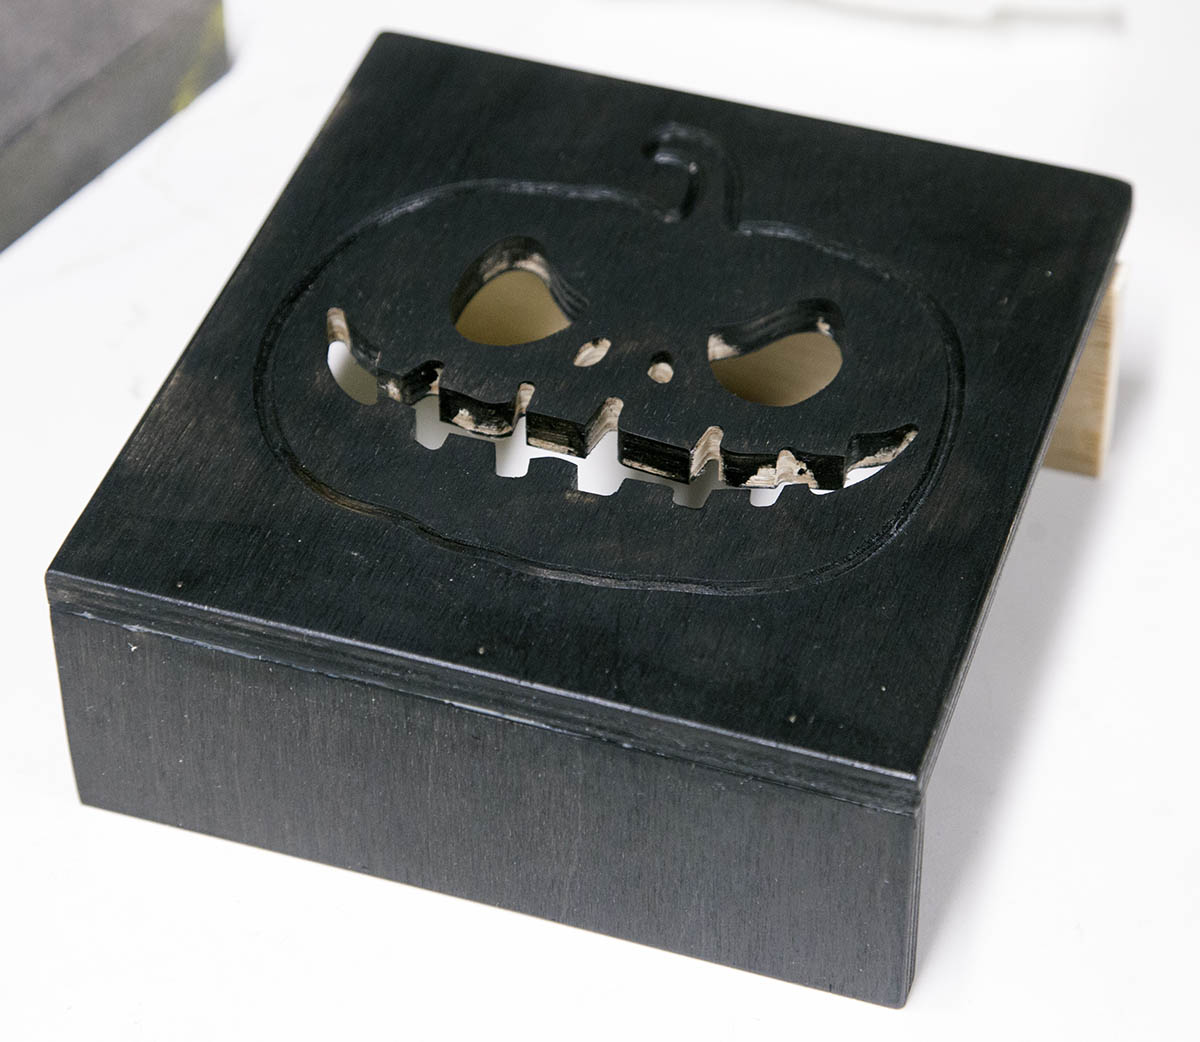
Load the G-code labeled "cutouts.txt" and run the job as before.
This time the CNC will cutout the mouth, nose, and eyes.
Step 7
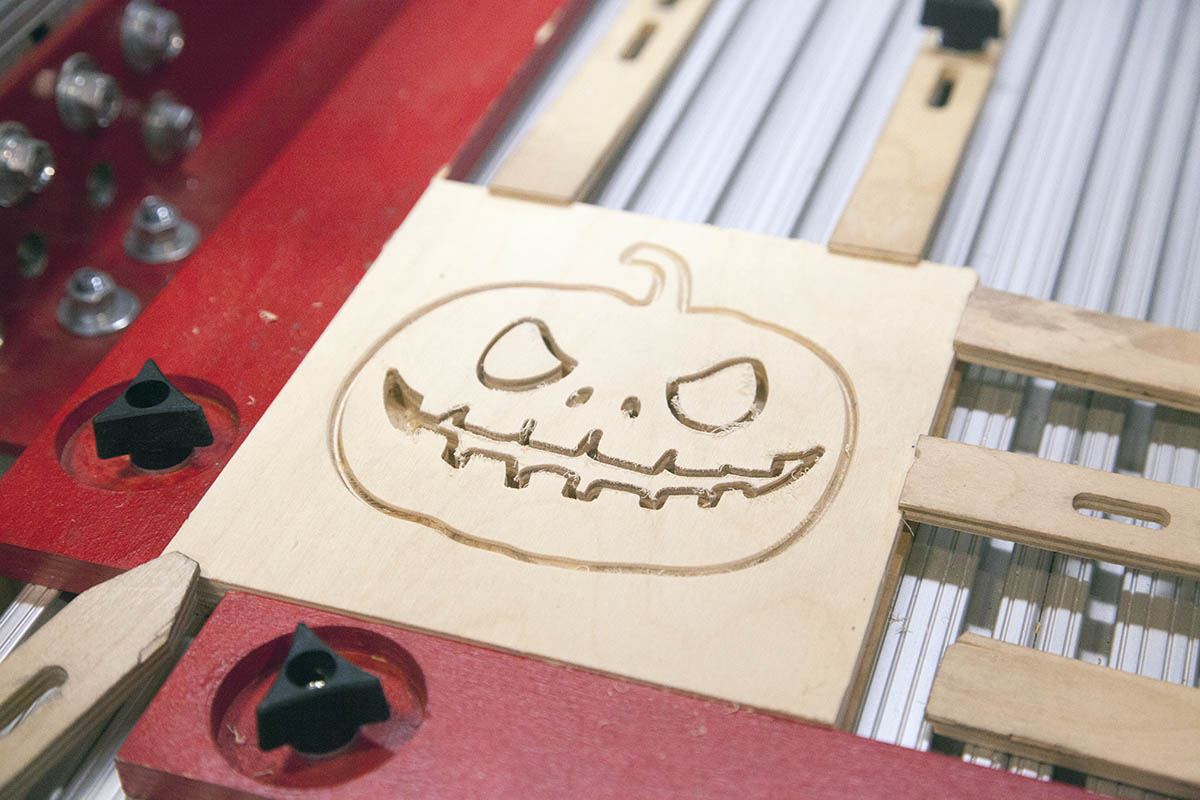
Once the job is complete remove the stock and add the other one back and rerun the job.
Step 8

Once both sides have been cut, punch out the mouth and eyes. Be sure to punch out from the back of the part to keep the plywood from splintering.
Use a a Dremel tool with some sort of carving bit or sander to remove the small tabs in the eyes and mouth.
Sand all surfaces with 220 grit paper.
Step 9
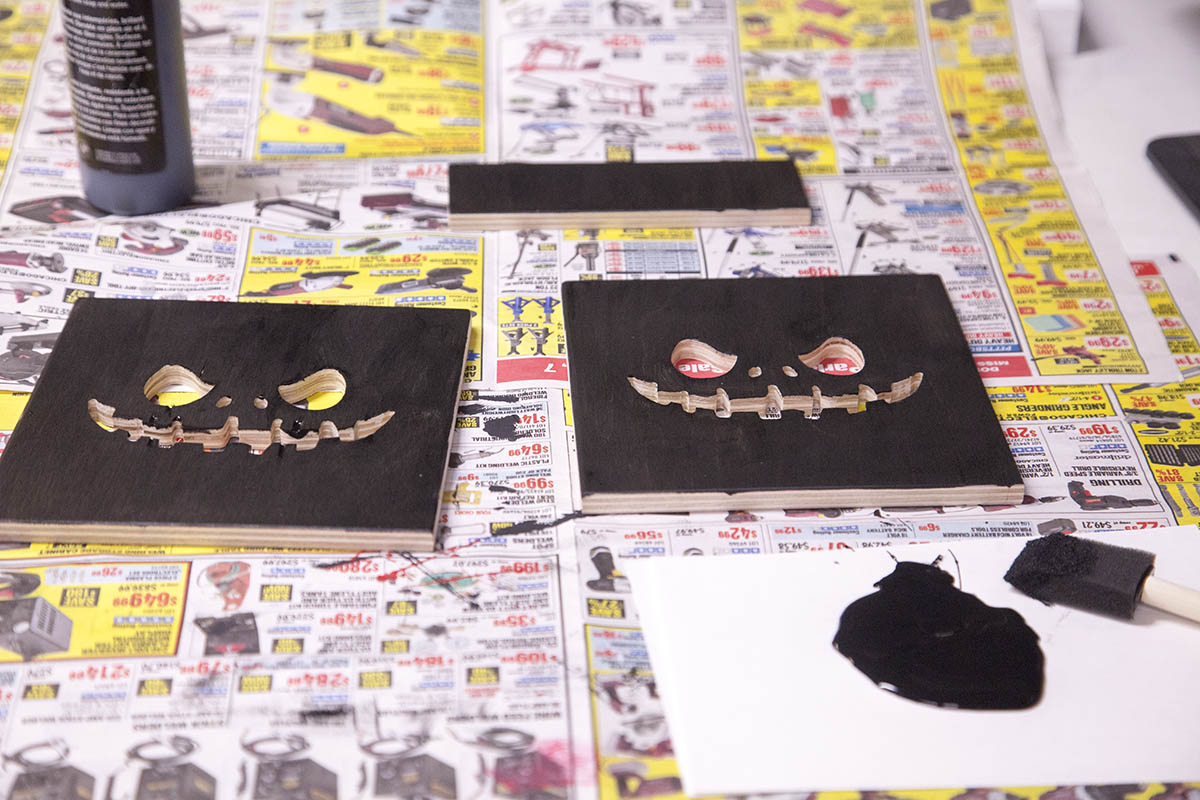
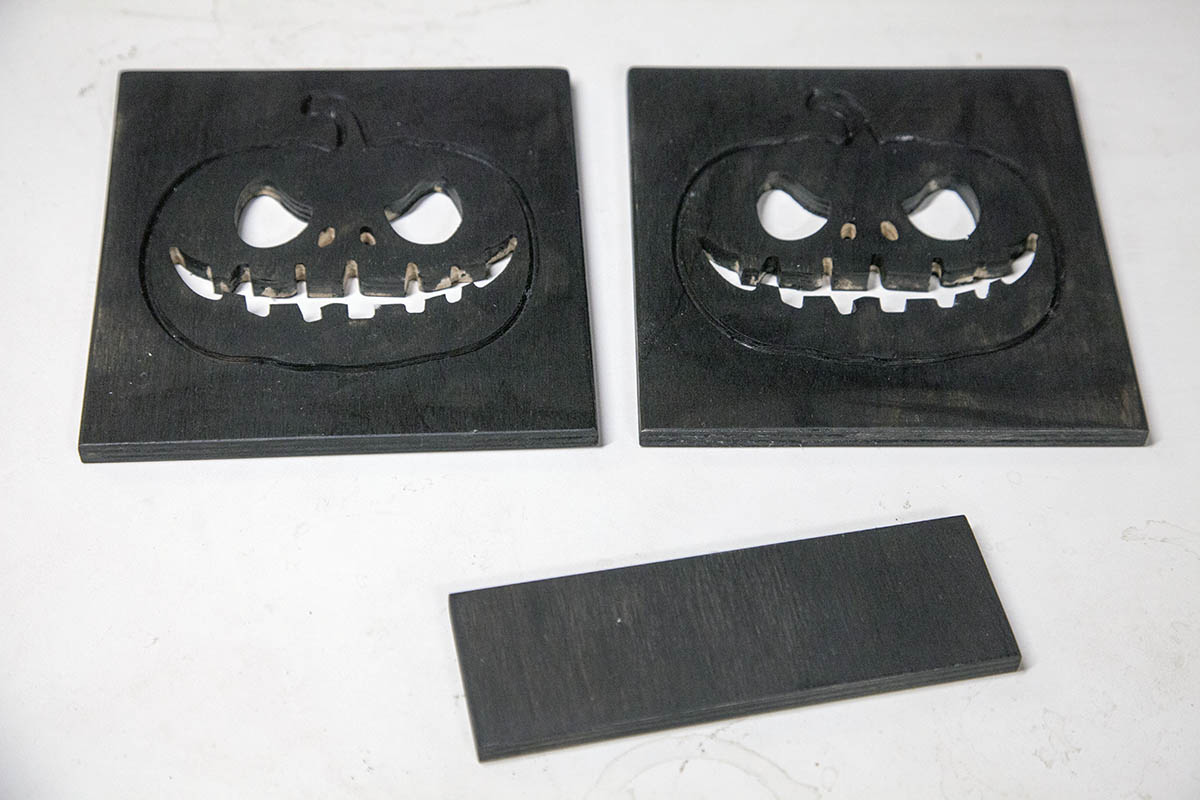
Give all three parts a single coat of paint. Wait until they are nice and dry, then give them a good sanding with 220 grit sand paper.
Step 10
Put a thin bead of wood glue one of the edges of the small (base) part as shown here. Smear it with your finger until the whole edge is covered, as shown.
Notice the small 2" tall piece of scrap. This will be used to help support our stock.
Step 11
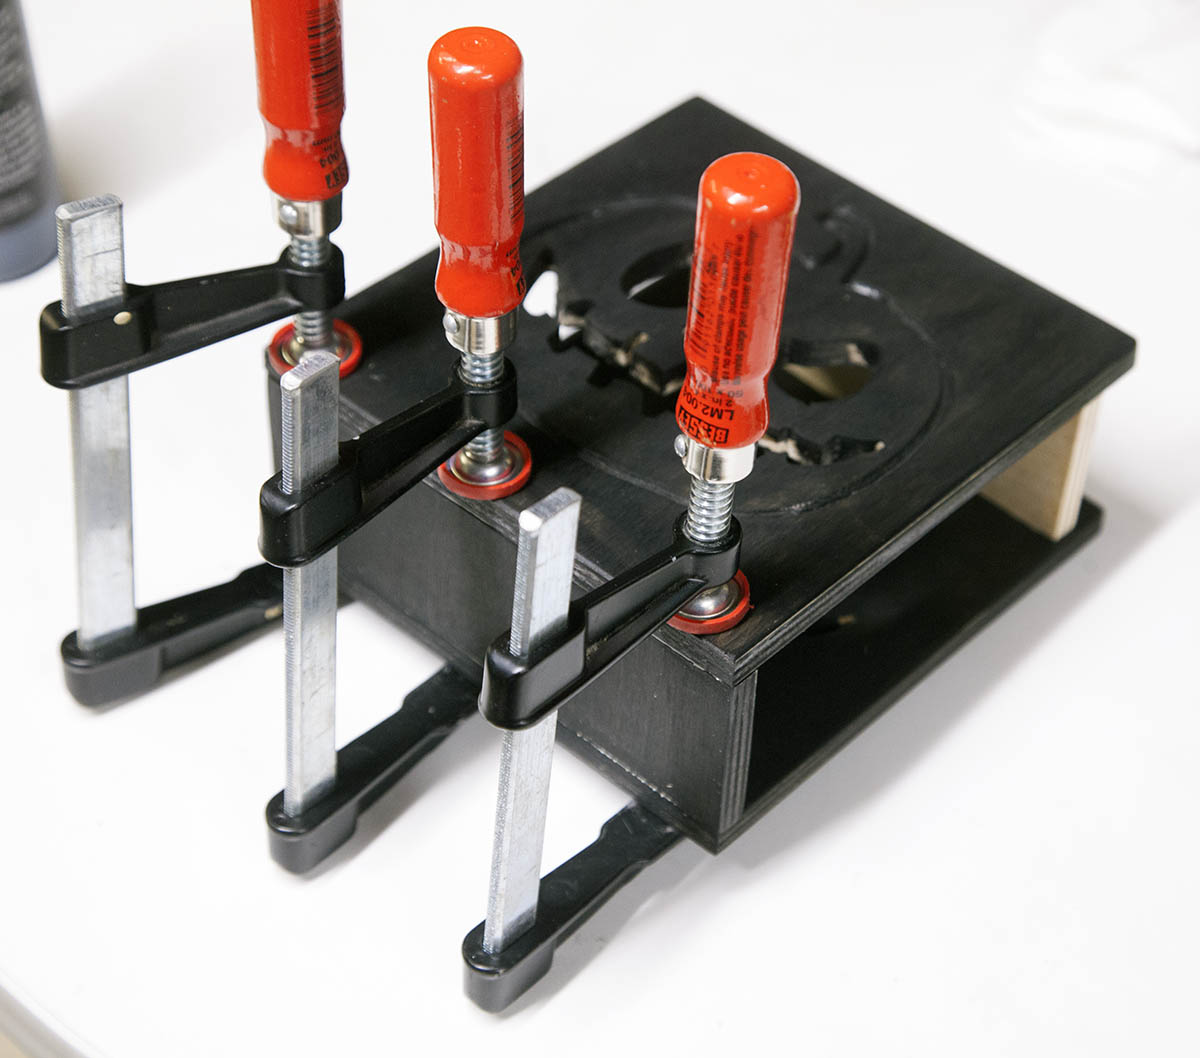
Place one of the sides on top of the base and the piece of scrap and align the bottom of the base and the side so that they are flush. Align the side edges as well.
You have a couple choices here. You can place a heavy object on top of the assembly to hold it in place while it drys. If you do this you should wait at least on hour before proceeding.
Another option is to tack the side onto the base with thin brad nails.
When ready flip the assembly over and do the same thing with the other side. No mater what method you choose, I recommend clamping the whole assembly for at least two hours.
Painting

I did several coats of orange acrylic paint on the pumpkin. The more coats the lighter the pumpkin will get and the less DIY look it will have.
I added a little green acrylic to the stem as shown, then finished it up by giving all the rest one more coat of the black.
I used a small paint brush to get inside the mouth, nose, and eyes.
Conclusion
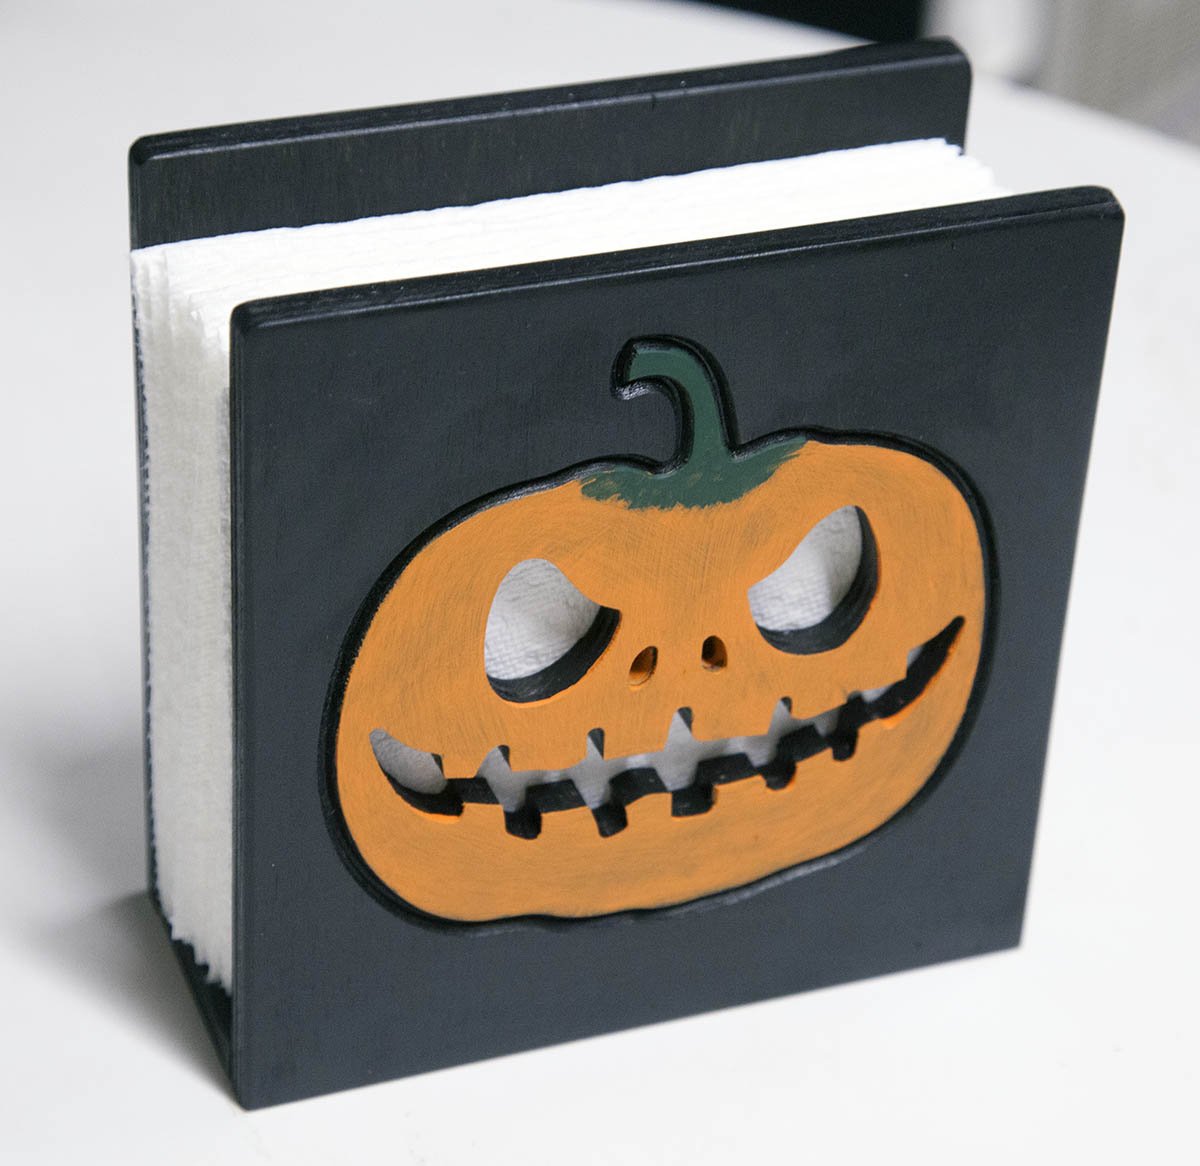

You can load up the holder with square napkins. You can also fold full paper towels into quarters and use those.
Here I folded paper towel halves in half.
Important!!
The joint between the side and the base is its weakest point. Without some sort of nail, fastener or dowel it will not hold up to a fall.
Three small 1/8" dowels can be added to each side by drilling a 1/8" hole about 1/2" deep and inserting some dowels with glue.
Cut them flush, then sand them smooth and touch up with some paint.
You can also add three small brass screws to each side by first drilling some pilot holes.
Bits and things
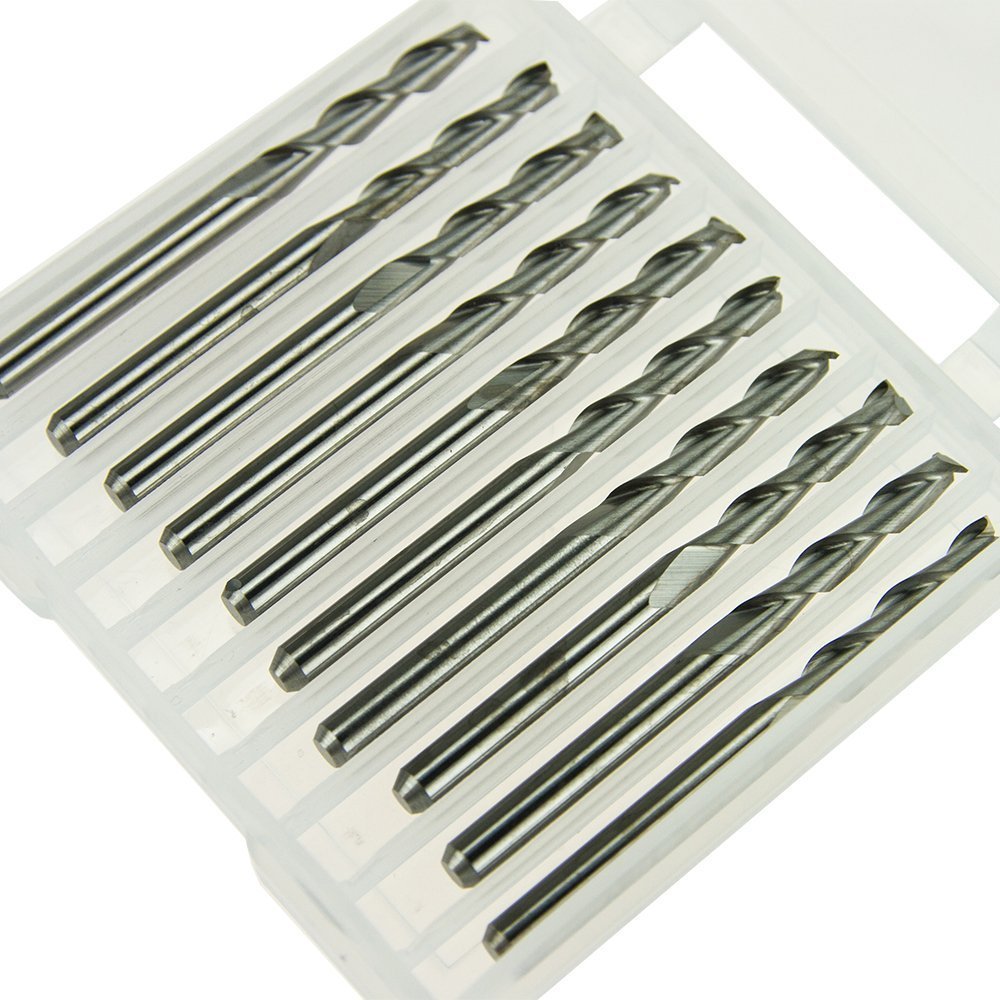
The 1/8" bits I used
I have found these to good all around 1/8" router bits. I have used them on acrylic, MDF, Corian, and wood.

This is not the highest quality V-bit, but it does get the job done and is a deal at the price.
If this is your first time using V-bits its a good choice as this particular project the V cut is not that critical. As a matter of fact the tip on mine was broke (my fault) and it still worked fine.
KRMx02

This project was completed with a KRMx02 CNC. This is a DIY CNC, and was designed so that anyone can complete this build.
A workbook with complete step-by-step instructions are available here: