

Upper Drive Chain
In this installment, I will show you how to install an upper and lower drive chain on you CNC Construction set.
While these are optional, I strongly recommend them. Once installed cable management is as easy as it gets.
As well as the hardware, you will need two 15mm x 40mm drag chains.
You can pick them up here:
or
Note that you will need your accessory brackets installed.
Prep the Drive Chain
Start by removing the end, and one link from one of the chains. The easiest way to do this is to remove the two retainer clips on each side of the link you want to disconnect. This will allow you to bend the links enough to remove them.
Next remove the next 11 links as shown here.
Reattach the end link you removed.
Remove all the retaining clips as shown here.
Installing the Upper Drive Chain
Step 1
You will need:
1, 10-24 x 5-1/2” piece of threaded rod
2, 10-24 hex nuts
2, #10 lock washers
3, small tie wraps
Step 2
Install the threaded rod into the exposed holes on the left Z rail, as shown here.
Secure with two 10-24 hex nuts and lock nuts.

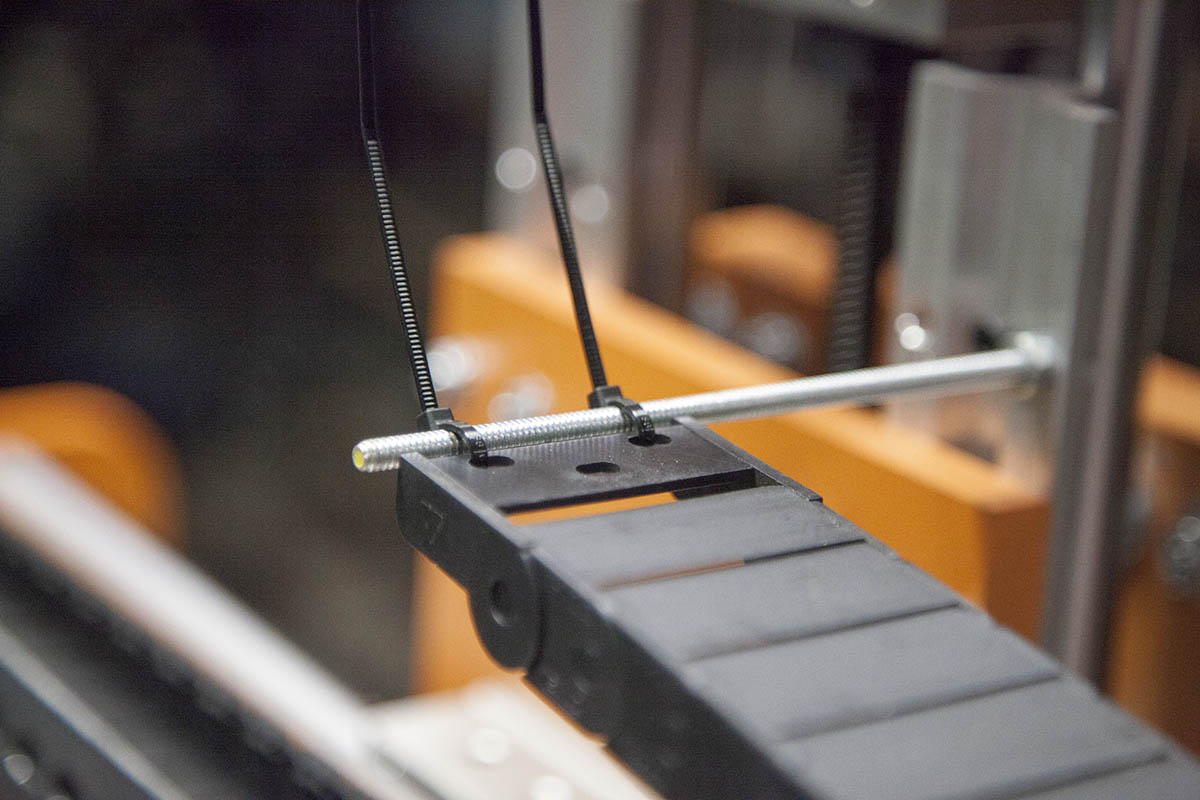
Step 3
Lay the upper drive chain (the one you shortened) on the upper accessory bracket and secure it to the threaded rod using two tie wraps, as shown here.
Step 4
Secure the other end of the drive chain with a tie wrap, as shown here.
Lower Drive Chain
Prep the Lower Drive Chain
Remove all the retaining clips as shown here.
Note that you will be using the fill 1M length of the lower drive chain.
Installing the Lower Drive Chain
Step 1
You will need:
1, 1” Steel angle
1, 10-32 x 1” Machine screw
2, #10 Plane washers
1, #10 Lock nut
1, 10-32 Hex nut
Step 2
In volume 2, you placed a hole on the right drive plate. Install the 1” angle bracket into this hole and secure with the 10-32 x 1” machine screw, washers, and hex nut.
Place the bracket at an angle as shown.
Step 3
You will need:
1, 1-1/2” Steel angle
1, 10-32 x 1/2” Machine screw
2, #10 Plane washers
1, #10 Lock nut
1, 10-32 Hex nut
Step 4
Install the 1-1/2” angle bracket as shown here. Secure with the 10-32 x 1/2” machine screw, washers, and hex nut.
Step 5
You will need:
1, 10-32 x 1/2” Machine screw
2, #10 Plane washers
1, #10 Lock nut
1, 10-32 Hex nut
Step 6
Lay the lower drive chain on the lower accessory bracket.
Install the 10-32 x 1/2” machine screw and washer into the center hole as shown here.
Note that you will need to screw the screw into place.
Step 7
Slip the machine screw into the angle bracket as shown here. Secure with a plain washer, lock washer and hex nut.
Step 8
You will need:
1, 10-32 x 1” Machine screw
2, #10 Plane washers
1, #10 Lock nut
2, 10-32 Hex nuts
Step 9
Place the other end of the lower drive chain into the position and mark the hole (Center hole)
Step 10
Drill the hole with a 3/16” dill bit.
Step 11
Insert the 10-32 x 1” into the center hole and secure with a plain washer and hex nut.
Slip the machine screw into the hole you just drilled and secure with lock washer and hex nut.
Running the Cables
Step 1
Place the Z motor cable into position on the upper drive chain as shown here.
Step 2
Add a retainer clip to about every three positions as shown here.
Step 3
Continue to run the Z axis motor cable down into the lower drive chain. Run the X axis motor cable as well and secure with the retainer clips.
Conclusion
That’t it. I added some of the same split loom tubing that I used in volume 3 to help protect the cable.
Be sure to run the machine to its extents to make sure the cable and the drive chain don’t get hung up.
Tie the cable with zip ties as needed once you are happy with the layout.