

As you already know, you can remove the Z-carriage from the CNC construction set.
The downside to this removal is that you have to remove the table to do so.
In this article, I am going to show you how to add a quick change Z-plate.
How Does It Work
A slight modification is made to the original Z-carriage plate.
Six 3” bolts are added as shown here.
A new Z-plate is made, and four indexing brackets are attached.
This assembly is slipped over the new bolts you added to the original carriage as shown here.
Generation One
In the first generation of the quick change z-plate, I used these 3/8” x 3/4” bolts with a 1/4” hole drilled down the center.
They were installed into 15/32” holes on the new Z-plate. The plate was then slipped over the bolts on the original carriage.
Knobs were then added to hold the new carriage firmly in-place.
I used this system for about a month and it worked well. It did have some problems.
The fit was so tight that the plates could be a little tricky to install and remove.
The 3/8” bolt head thickness was not consistent so every Z-plate would have to be shimmed differently.
The holes in the 3/8” bolts were a pain to make and almost impossible if you did not own a metal lathe.
Generation Two
In generation two of the quick change plate I replaced the 3/8” bolts with brackets.
These were much easier to make and easier to use.
The brackets fit much looser over the bolts and are used only for indexing the plate. The actual knobs are what hold the plate in-place.
I could even use a z-plate installed on another machine to align the 3” bolts so that the Z-plate could be used on two different machines.
The plate shown here was assembled and calibrated for one of my other machines. I was able to move it to this machine without a single adjustment.
Modifying the Original Z-Plate
The Z-carriage is removed from the machine and the six bolts shown here are removed.
3” bolts are added in-place of the bolts removed, as shown here.
The new bolts were roughly centered in the holes and tightened.
The Z-carriage is then reinstalled on the machine.
From this point on, all accessories added to the machine will be via the new quick change plates.
Making a Quick Change Z-plate
What You Will Need
7-1/4” x 7-1/4” x 1/4” Aluminum plate
16, #10-32 x 5/8” Machine screws
16, #10 Eternal tooth lock washers
16, #10-32 Hex nuts
4, 1-1/2” x 1” Indexing brackets (Step 2)
1/4” Drill bit
9/32” Drill bit
5/16” Drill bot
12, Narrow 1/4” washers (see text)
4, Small 1/4-20 Knobs.
Here are some knobs I have used;
Step 1
The Quick Change Z-plate is made from a piece of aluminum plate stock 7-1/4” x 7-1/4” x 1/4” thick.
Start by marking the larger 5/16” holes. These will be used to mount your plate.
Mark the 16 remaining 1/4” holes. These will be used to mount your brackets.
If you need more space for mounting your accessory, you can use a taller piece of stock. Stick to the 7-1/4” width as increasing this dimension will reduce you X axis cutting envelope.
The finished plate.
Step 2
Next take a piece of 1” x 1/8” steel bar and cut it down to 1-1/2”.
Mark the five holes shown here. The four outer holes are 1/4” in diameter. The center hole is 9/32”
If you decide to plasma cut the brackets, cut all the holes to 1/4”, then drill the center hole to 9/32”
The finished bracket.
Step 3
Take 4, #10-32 x 5/8” machine screws and attach each bracket to the plate, as shown here.
Secure with a #10 lock washer and 10-32 hex nut.
Do not tighten. You want them loose for now.
The finished assembly.
First Time Install
Step 1
Make sure the four brackets are loose.
Step 2
Slip two narrow 1/4” washers over each of the 3” indexing bolts, as shown here.
Note that standard 1/4” washers are too big. You need some narrow washers.
Get them here:
Step 3
Slip the plate assembly over the indexing bolts.
Step 4
With the indexing brackets resting on the indexing bolts make sure the edge of the plate is square with the table.
It may help to slightly snug up a couple of the screws to hold the plate in-place while you are squaring it up.
Once square, tighten the screw holding the brackets. You should be able to tighten the two outside screws while the plate is in-place.
You can remove the plate to tighten the others.
Step 5
Place a narrow washer over each indexing bolt and secure with a 1/4-20 knob.
With the knobs tight, check the front of the plate with a square.
In my case I needed to add a .012” shim to the two bottom indexing bolts.
Conclusion
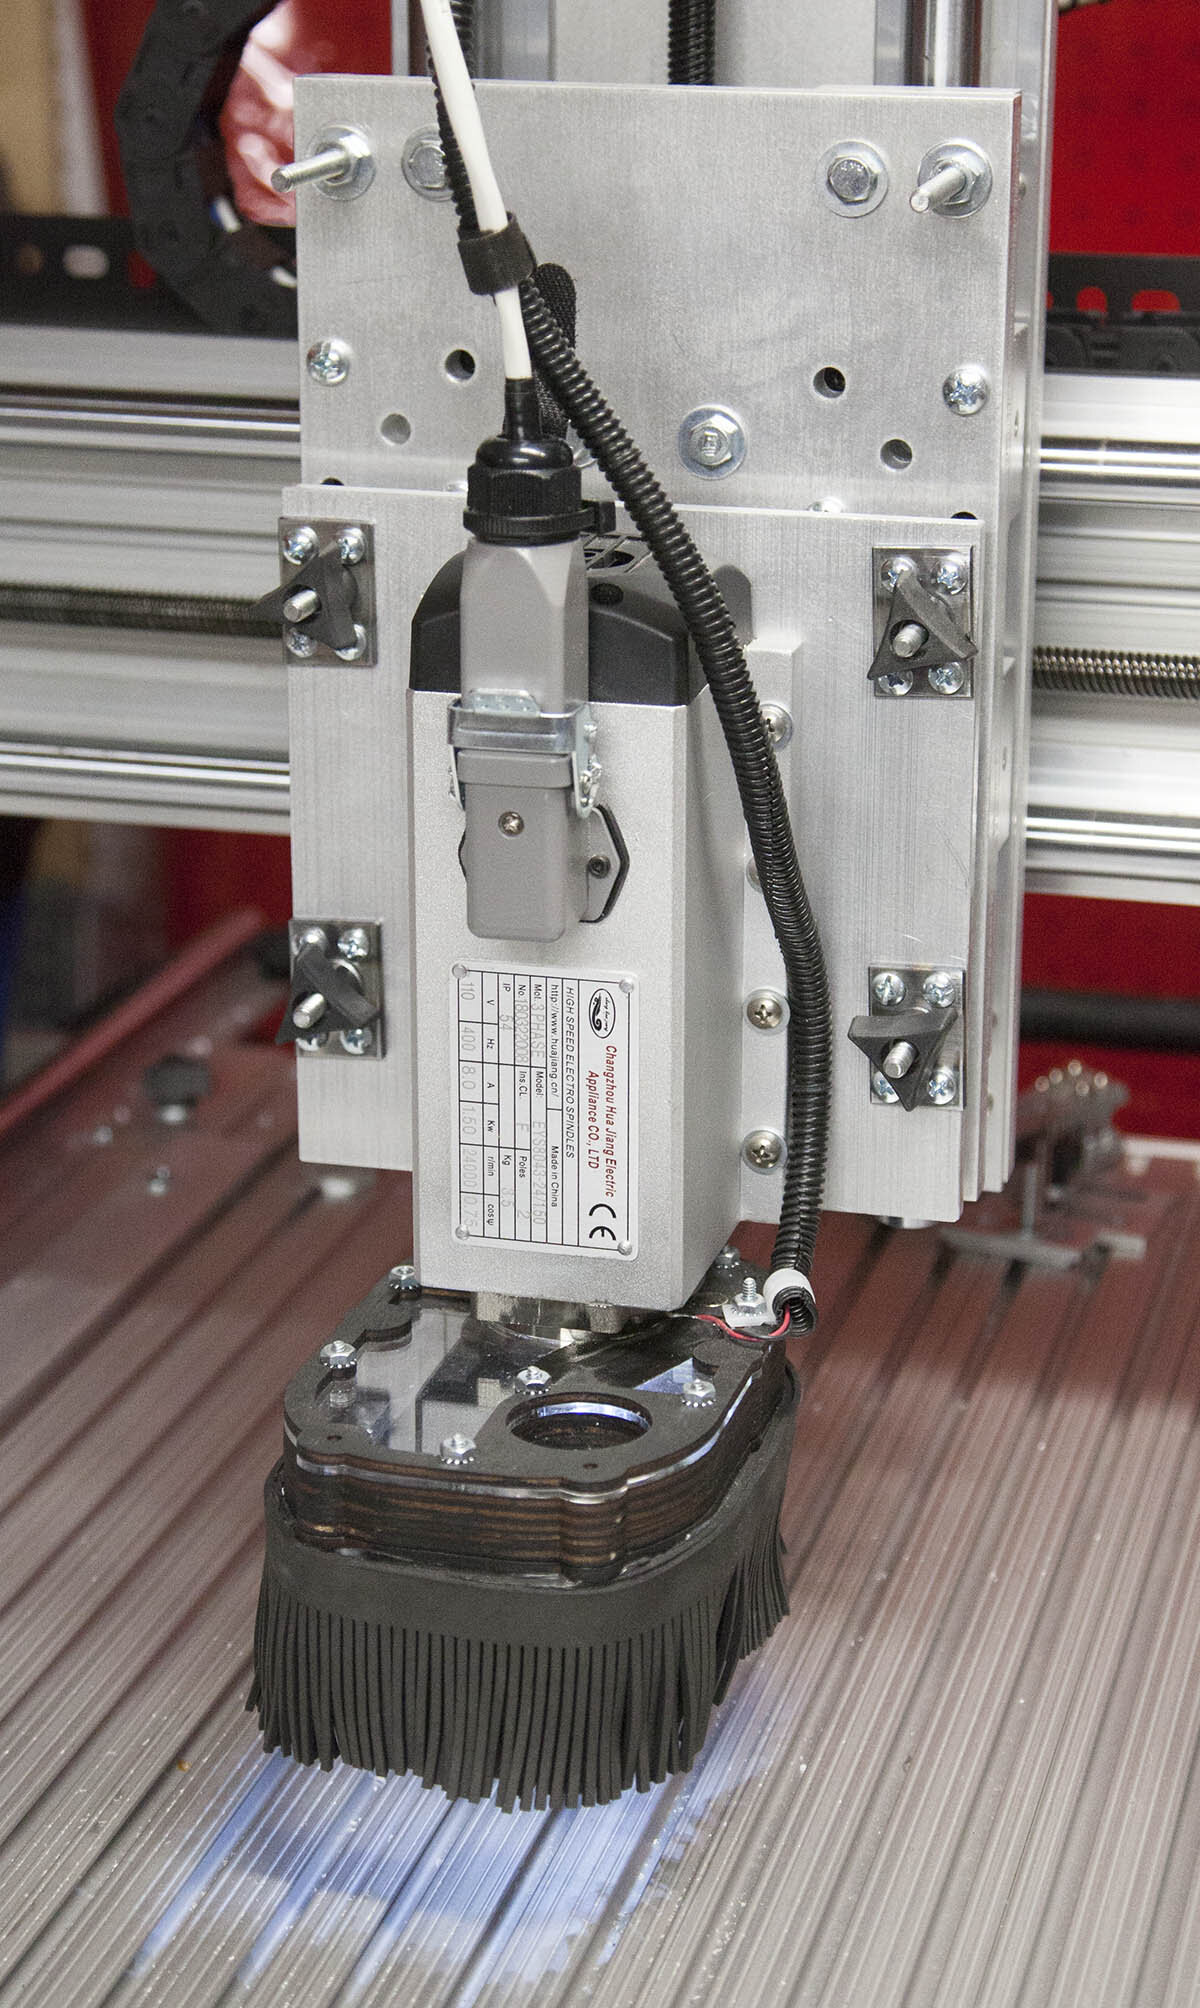
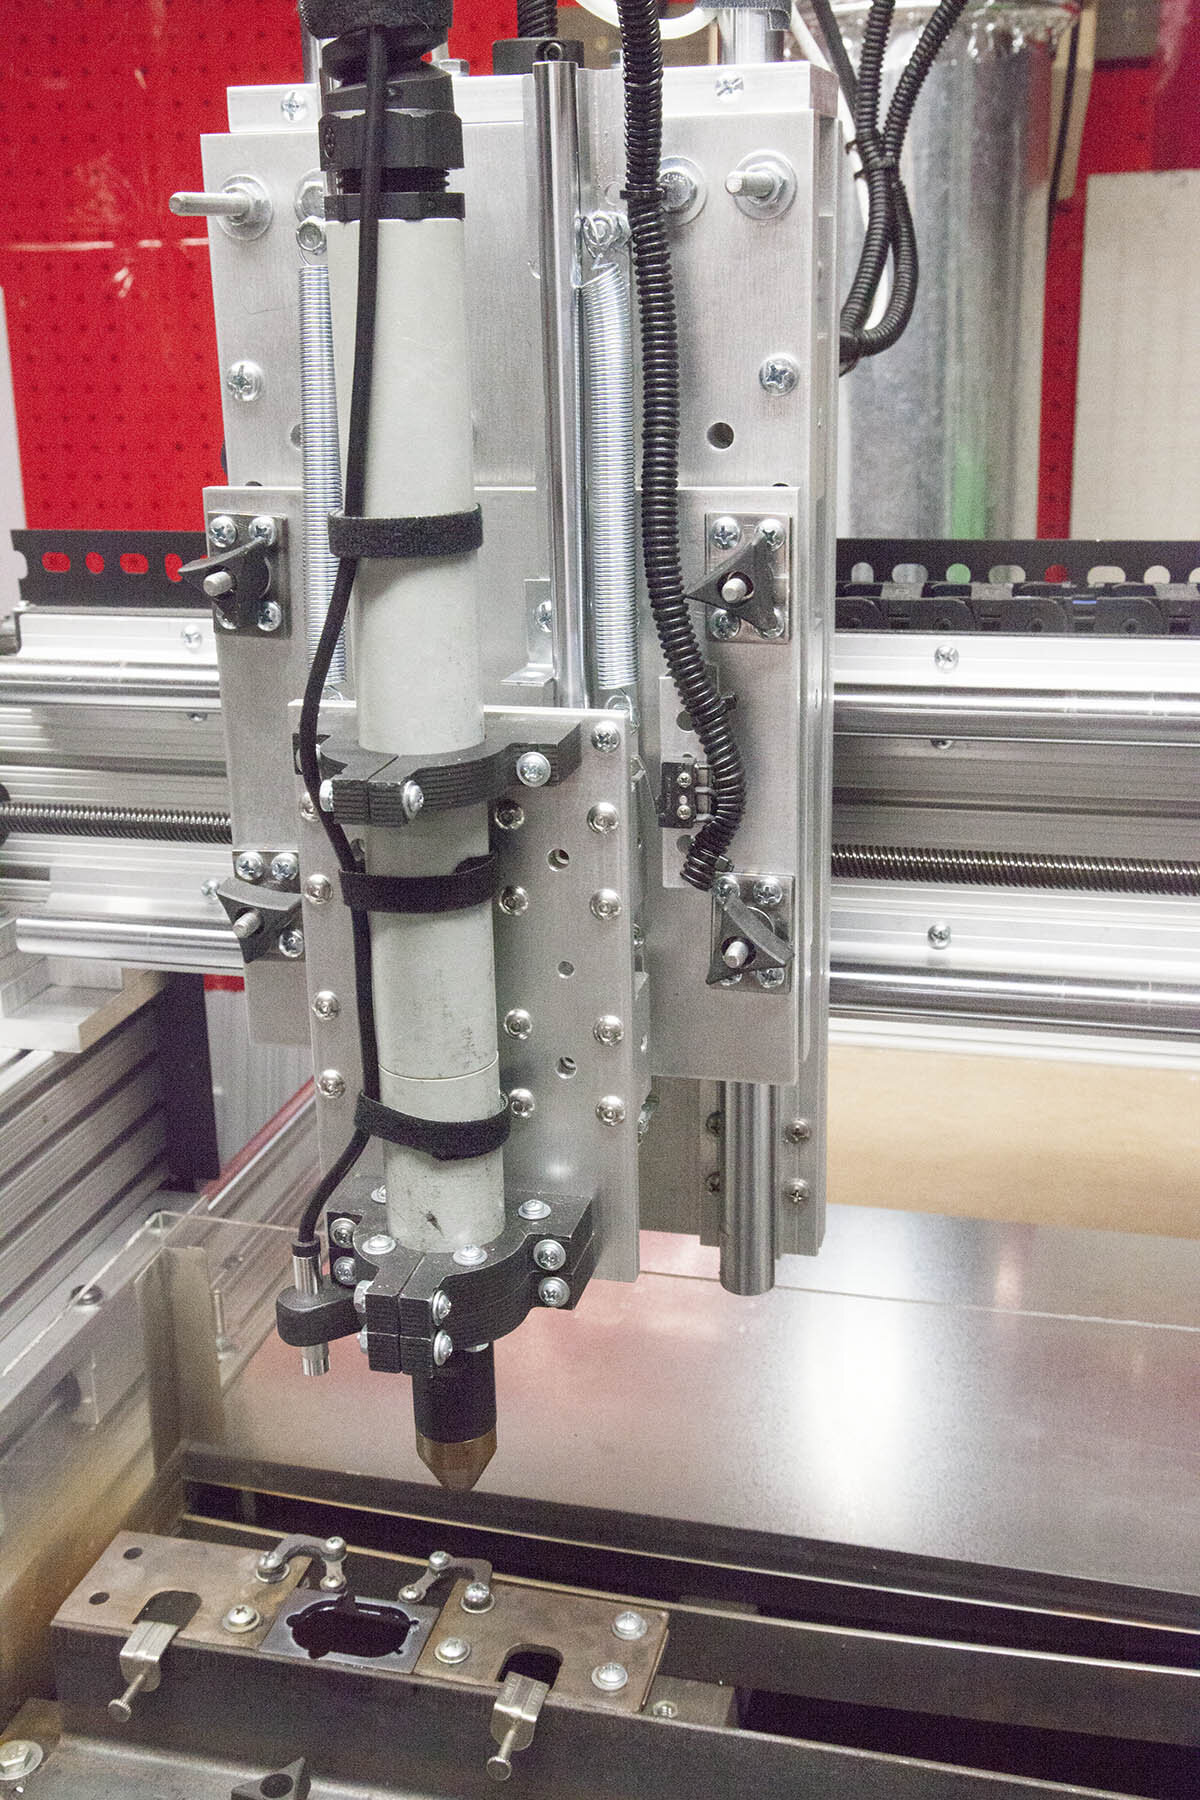
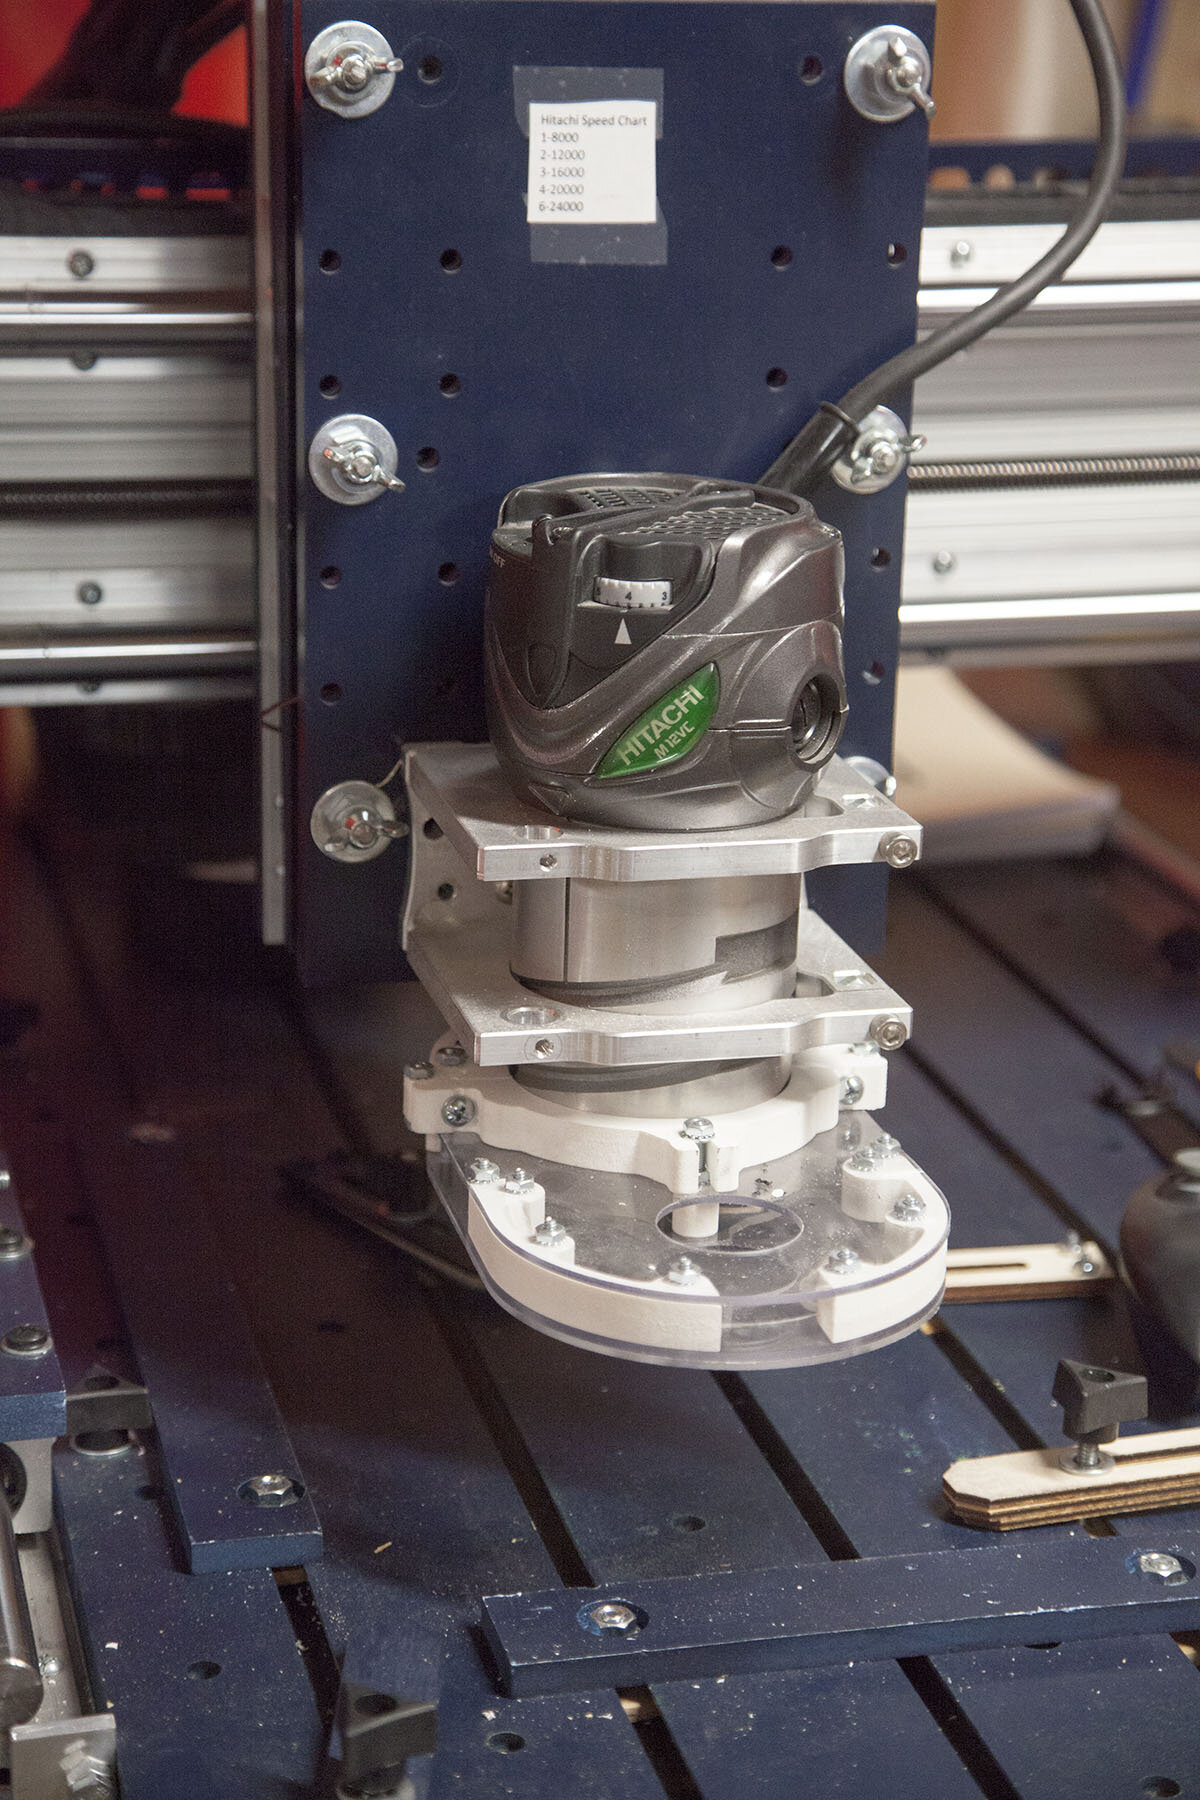
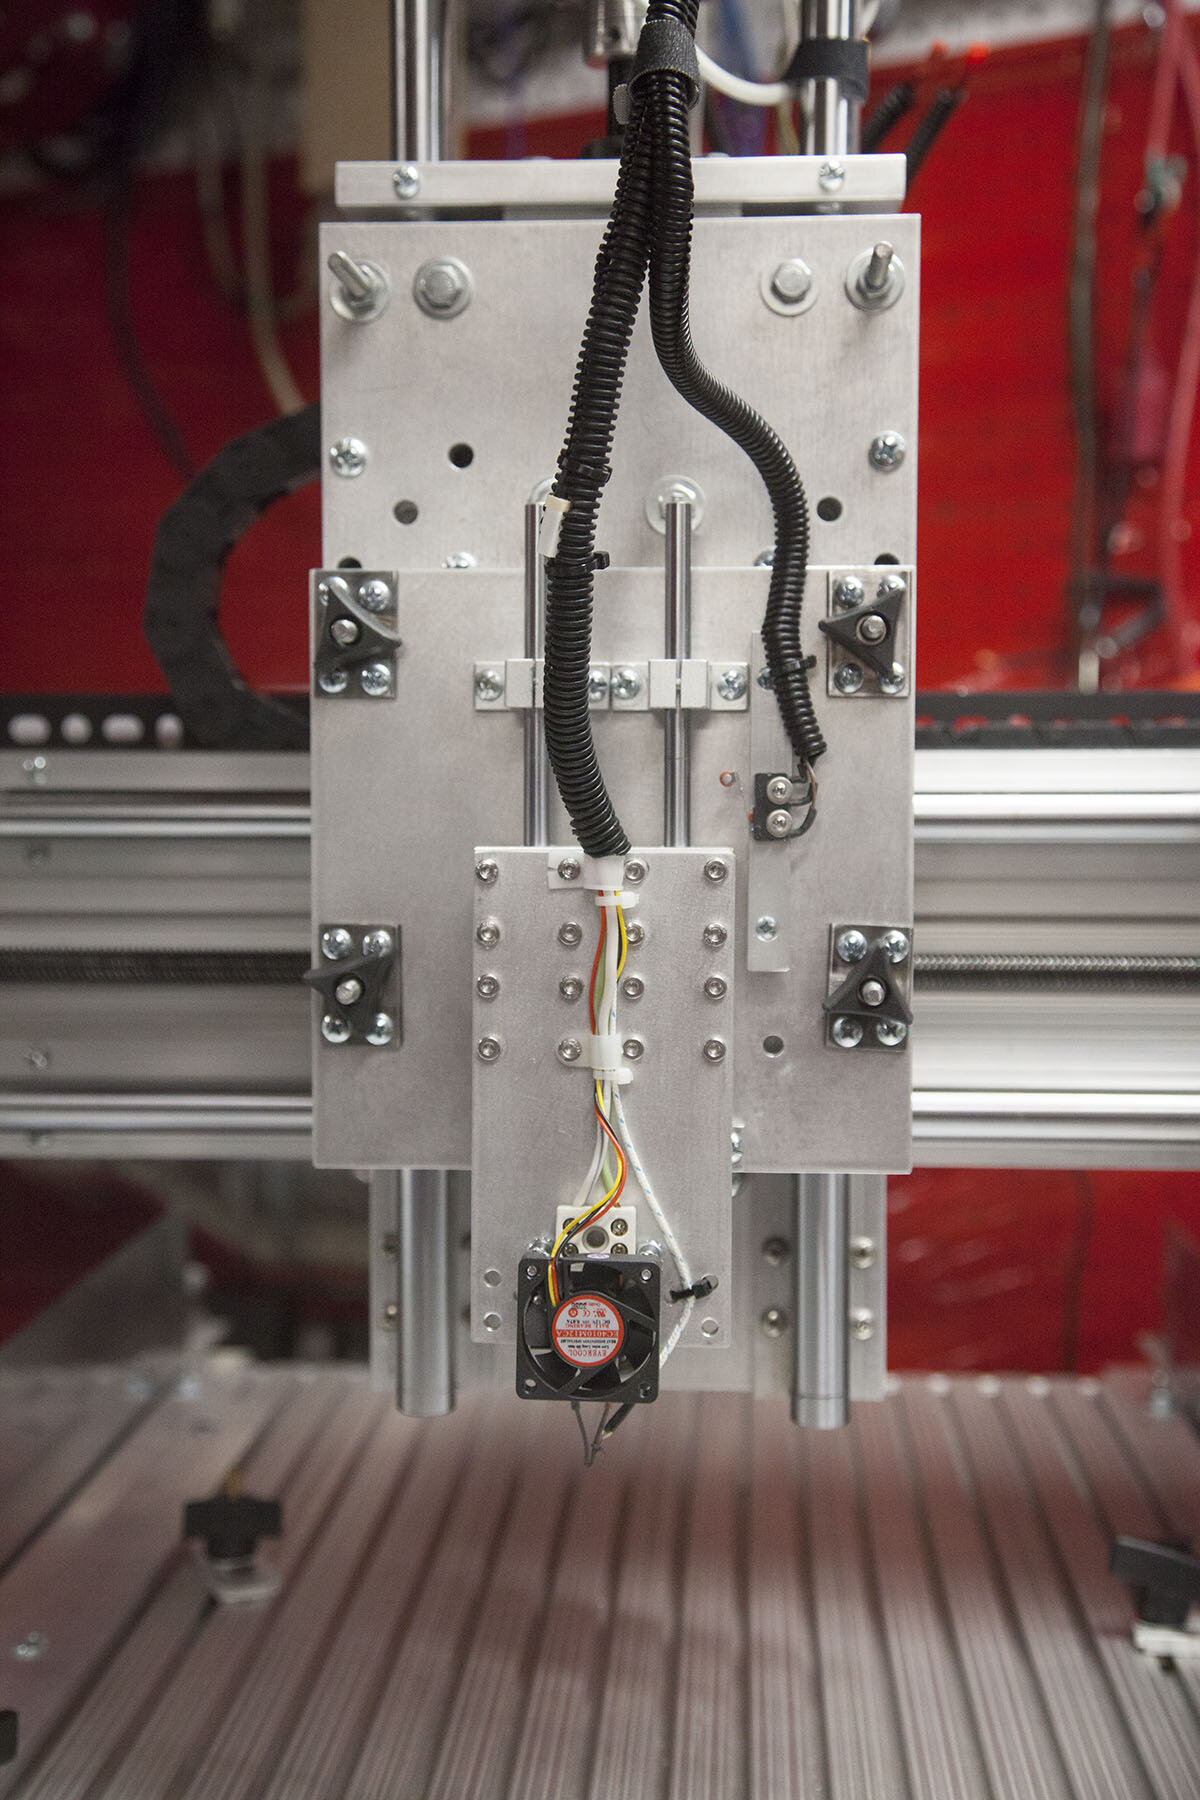
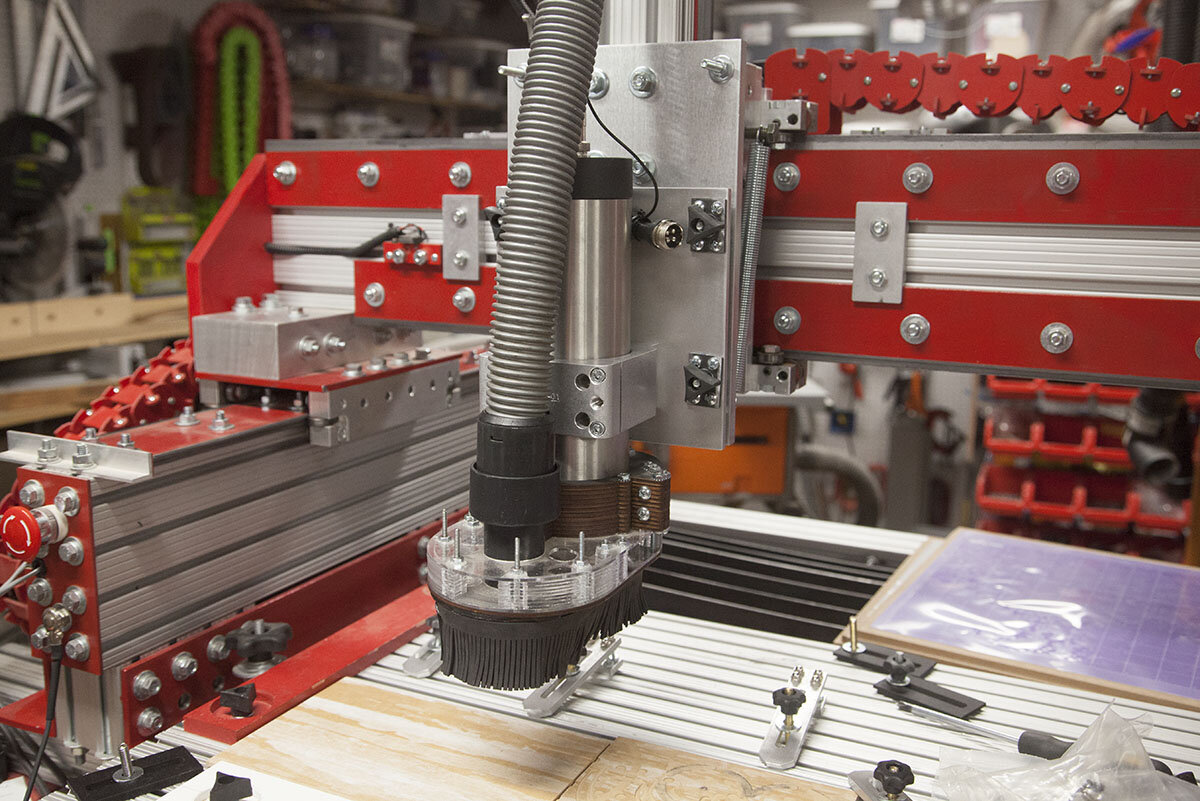
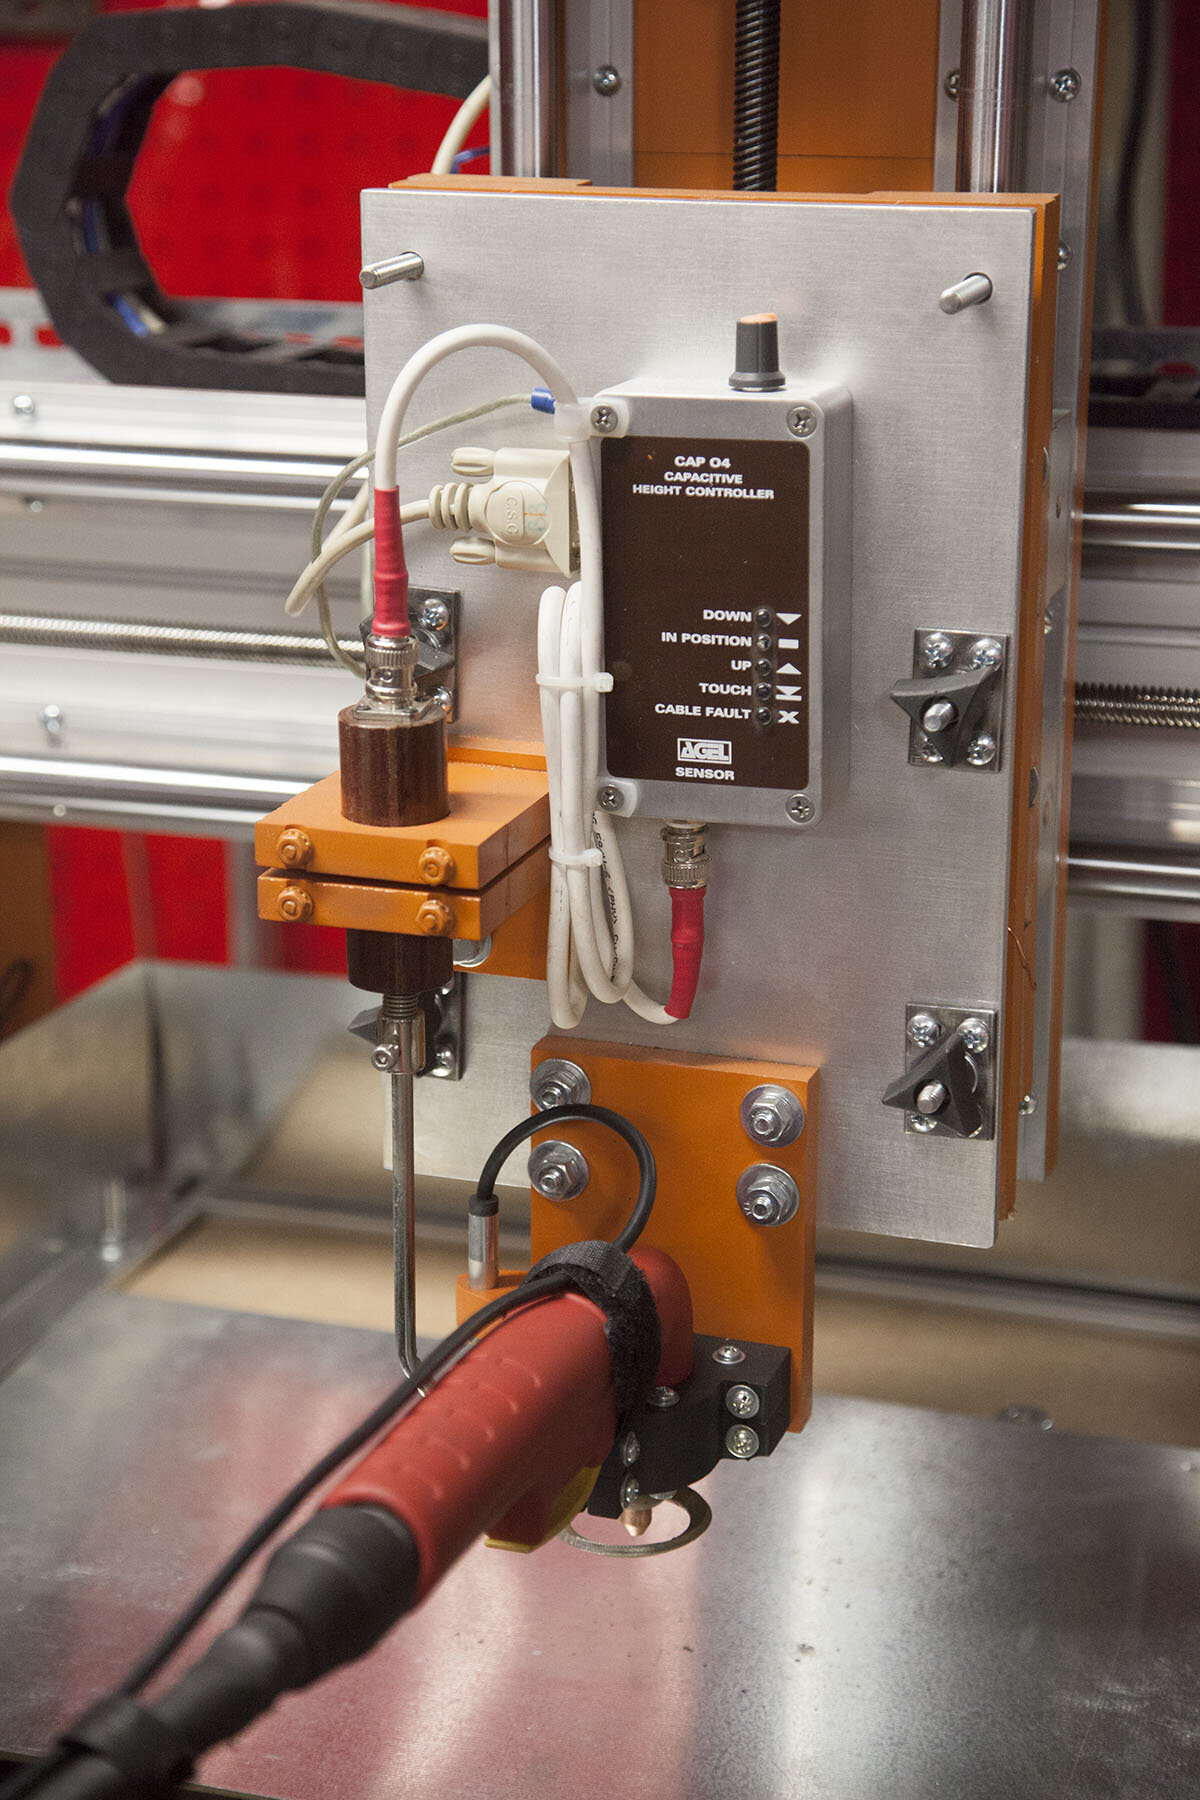
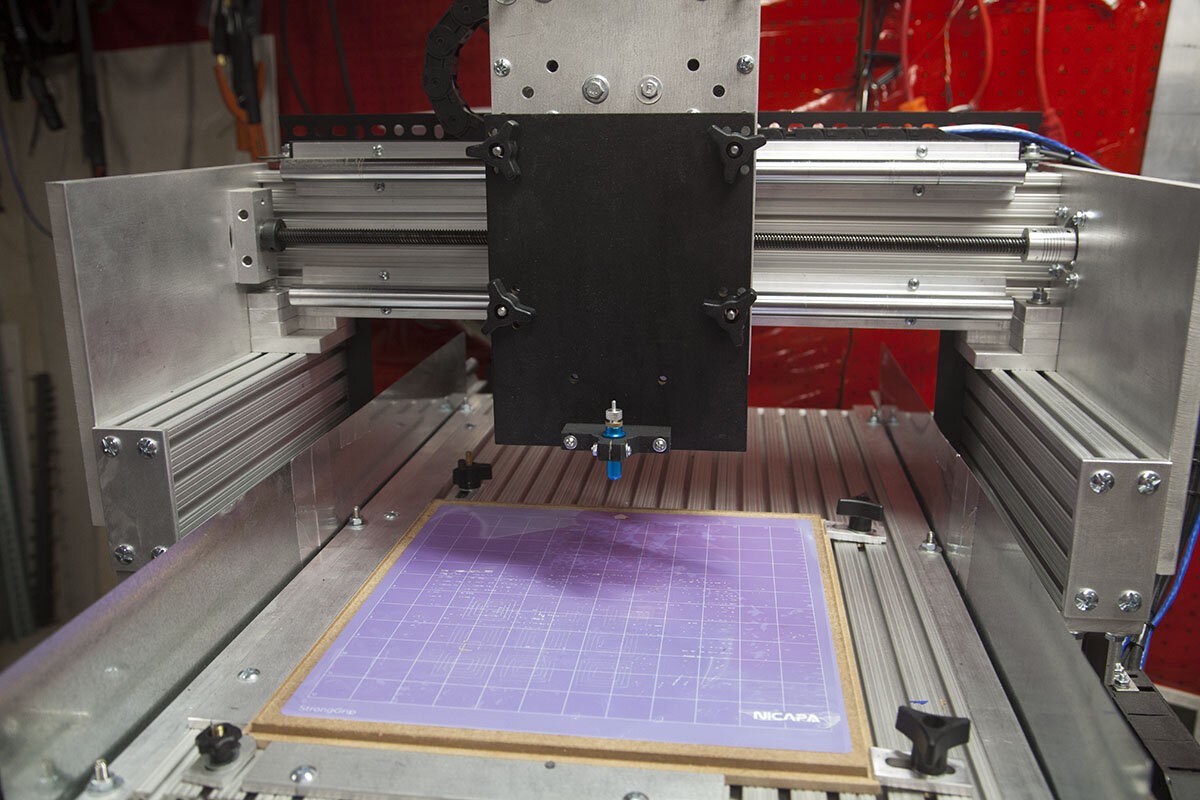
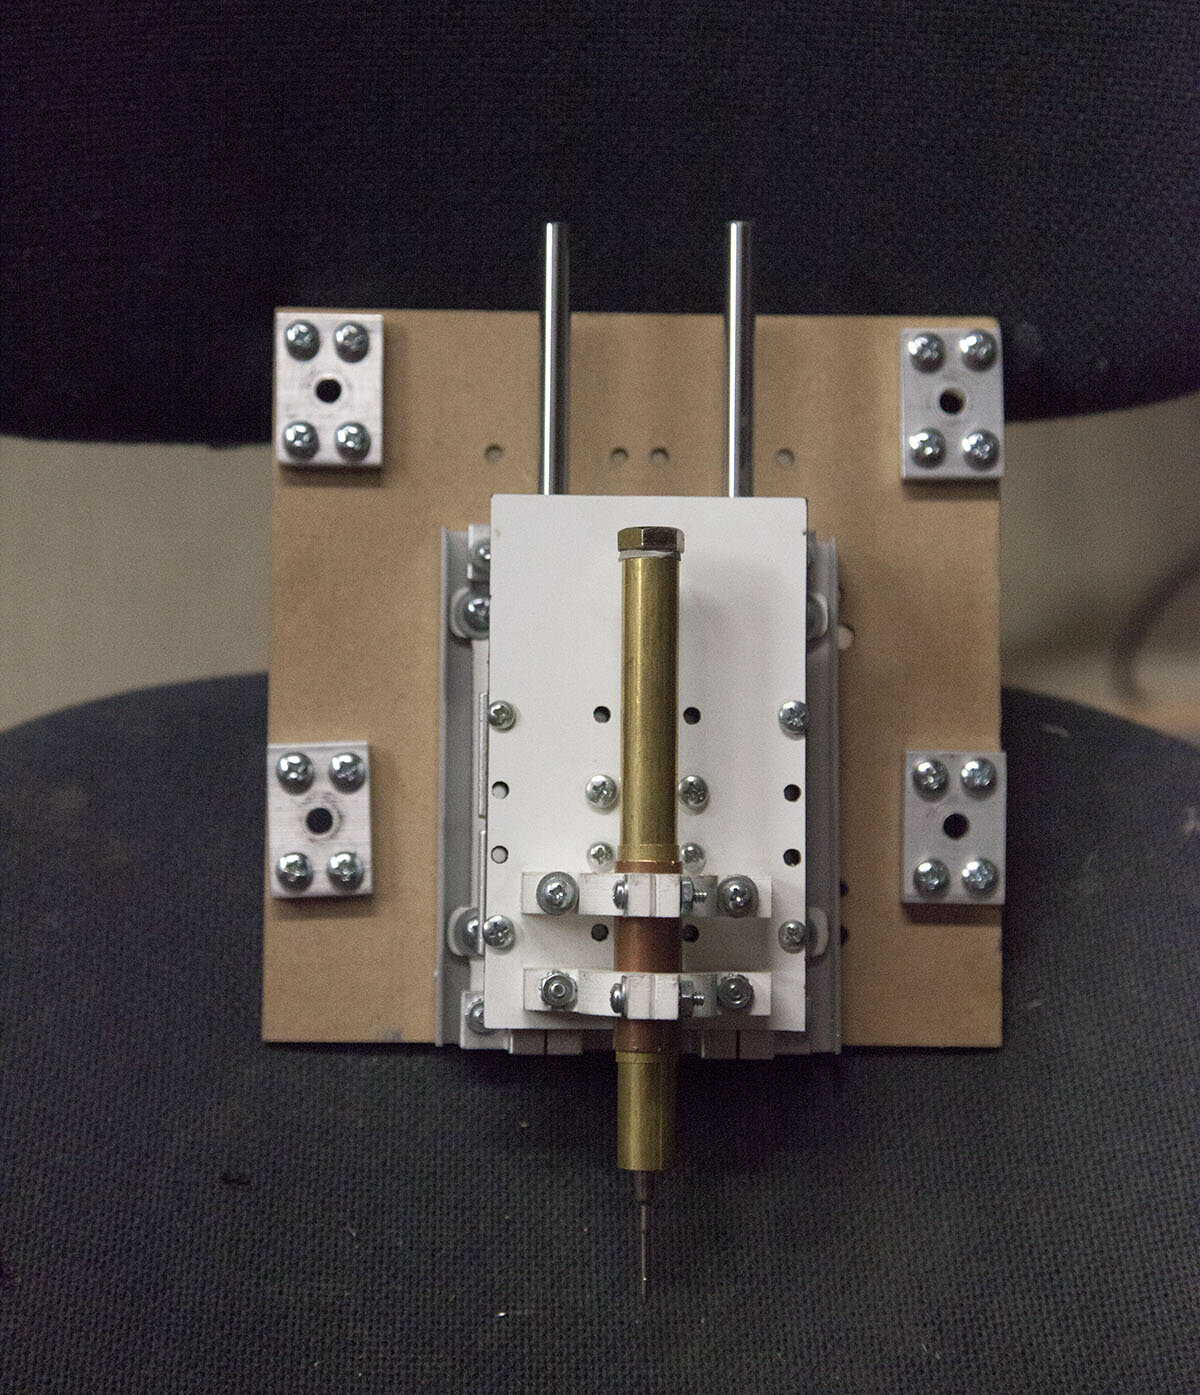
The quick change plate is ready for your accessory. The following are some of the quick change Z plates I have created.

Connectors
If you are going to be removing a plate completely, you will need to add connectors where needed.
In the case of the 1.5 kw spindle, it already has a connector.
I did have to add a small jst connector for the light on the dust shoe.
In some cases it might not be feasible to remove the z plate completely. Here I am hanging my Hyperthern floating head system on a nearby wall.
Detailed Drawing Files

You will be provided with a secure link to download the various drawing files.
While you can layout your quick change plates manually, these files are provided for convenience and flexibility.
The drawing files consist of the following formats:
dxf
eps
ai
I have provided several web pages to help you with the build. See it here:
Contents of Download
Quick Change Bracket.ai
Quick Change Bracket.dxf
Quick Change Bracket.eps
Quick Change Z Plate.ai
Quick Change Z Plate.dxf
Quick Change Z Plate.eps
Quick Change Z Plate Large.ai
Quick Change Z Plate Large.dxf
Quick Change Z Plate Large.eps
Quick Change Bracket.pdf
Quick Change Z Plate.pdf
Quick Change Bracket.job (SheetCAM)
KRMx02 Adapter.ai
KRMx02 Adapter.dxf
KRMx02 Adapter.eps
I have created a bundle that contains several drawing files for your convenience. The bundle also contains a some printable PDFs so that you can print templates.